Pages

Thursday, February 28, 2013

Always Time for a Brownie

Hi, my name is Gian and I love a good brownie. [Readers answering in unison, "Hi Gian."] My love for brownies, as with my love for most sweets, has been a present force throughout most of my life. In fact, Sister reminded me a couple years ago (as I complained about how gross it was that TF licks the spoon, and sometimes bowl, after mixing up brownies) that during my uber awkward teen years I used to love a good brownie batter. What the what?! I completely doubted her. After some prompting, I re-tasted it. Turns out, Sister speaks the truth...this time at least. 

In addition to reintroducing me to my love of brownie batter, TF also taught me to love gooey brownies. This too was met with some resistance at first, but eventually I came around. I made my first gooey brownie during Snowmegeddon circa winter 2010 (or as I like to call it, the last time I saw snow). It was both a wonderful and awful time (I can only handle about two days inside before I begin to go stir crazy), but even as a budding baker, I knew there was no better way to cope than to bake my way through it. 

And thus I made these:


Sure they were out of the box, but filling my insides with warm, chocolate gooeyness was just the cure to get me through life inside an igloo. Although there is no snow here today (because winter hates me and insists on happening everywhere I'm not), it is TF's birthday. And even though he's not here, it seemed only fitting that I make this newly discovered recipe in his honor today. 

Side note: I had some fun making him a baby-picture-laden present and couldn't help but share this one..

He has so many gems, it's taken everything in me not to share more

Nonetheless, I'm usually not a fan of desserts that claim to be healthier than their original counterparts, but this one actually held true to its claims. TWIST?! And, because it is the last day of February after all, it gave me the opportunity to use up some of my remaining Valentine's M&Ms. 

Skinnier Brownies A-Go


Ingredients
Inspiration found here
  • 2/3 cup all-purpose flour
  • 1/2 cup unsweetened cocoa
  • 1/4 tsp salt
  • 1/3 cup butter
  • 2 ounces chocolate, chopped
  • 1 cup granulated sugar
  • 1/4 cup almond milk
  • 1 tsp vanilla extract
  • 2 large egg yolks
  • 1 large egg
  • 1/4 cup white chocolate chips

Preparation
  1. Preheat oven to 350 F
  2. Place butter and chopped chocolate into a medium sized microwave safe bowl and microwave on high for about 45 seconds. Mine began to pop fairly early on, so I recommend stirring the mixture about every 15 seconds or so
  3. Stir the mixture until it is smooth; set aside to cool slightly
  4. The the bowl of a stand mixer, combine sugar, milk, vanilla, egg yolks and egg and mix on medium until combined
  5. Add chocolate/butter mixture and blend for about 1 minute
  6. Combine flour, cocoa,and salt into a medium bowl and stir with a whisk
  7. Add dry mixture to the wet mixture and blend until well combined
  8. Fold in white chocolate chips
  9. Grease brownie ban with cooking spray and spread batter evenly into pan. Top with fun M&Ms
  10. Bake for 15-20 minutes...15 is you like them the TF way:)


I leave you today with memories from a happier, more snow-clad time...

               Always prepared for any weather situation, Bax rocked her red puffer coat all week.

Bax loves the snow, but not as much as Penny.

Sister and I with our puppies. Bella had to adorn a coat at all times so we didn't lose her. This was not her favorite time.

Despite the fact that this was my first winter on the east coast (and I'd never shoveled a driveway a day in my life), I shoveled like a champ....and hated it.


Monday, February 25, 2013

Sometimes You Just Need a Cookie

Well, I'm officially done with my Valentine's Day-related posts...and also holidays until Memorial Day. I hate, hate, hate this lull in the year. You'd think I'd have slightly better feelings about it given that my birthday is at the beginning of March, but alas, I've tired of birthdays. Actually, that's not true, I've just tired of my own. I find it exhausting trying to organize people and think of what I want to do. What I want to do is have someone else make choices for me and me to just show up. Since I'm fairly certain this will never happen, I shall hunker down and ride out the next couple of weeks.

On Sunday morning I awoke wanting three things out of the day to cheer me up: to do yoga, to take advantage of the beautiful weather with a trip to the dog park, and to have a cookie. Despite not really being a stress eater, sometimes I really just need a good cookie to make life a little brighter. It's not a craving that can be satisfied by just any cookie, no, it takes a very special cookie to truly hit the spot. Today I found said cookie courtesy of one of my new favorite blogs: Sally's Baking Addiction. I'm telling you, she is a baking genius. I also love that she lives in Baltimore, it allows me to retain a sliver of hope that I will one day run into her on the street. Yes, I have odd dreams...

But in all honesty, this giant cookie was AMAZING. I worried while baking it that I would snap and eat the whole thing (which was definitely not meant to be done by one person in a single setting). Luckily, some willpower still exists inside me and I was able to save half of it for later. Side note, later came today. Although, the cookie did it made it a whole 24 hours, which I was not sure at first would happen, so that's something. Nonetheless, next time you're in the mood for a good pick me up, or just want a really good cookie, I highly suggest this one!

XXL Death By Chocolate Cookie


Ingredients
  • 2 Tbsps unsalted butter, softened to room temperature
  • 2 Tbsps granulated sugar
  • 2 Tbsps dark brown sugar
  • 2 Tbsps beaten egg (crack an egg, beat it, and use 2 Tbsps)
  • 1/2 tsp vanilla extract
  • 1/4 cup all-purpose flour
  • 2 Tbsp unsweetened cocoa powder
  • 1/2 tsp baking soda
  • 1/4 tsp salt
  • 1/4 cup semi-sweet chocolate chips
Preparation
1. Pre-heat oven to 350 F

2. Combine softened butter and sugars in the bowl of a stand mixer until creamed, then add in egg and vanilla

3. In a small bowl, whisk together flour, cocoa powder, baking soda and salt. Add dry ingredients to stand mixer bowl and mix with wet ingredients until well combined

4. Stir chocolate chips in by hand. Chill dough in fridge for 15 or so minutes. Cold dough is your BFF (this is my new baking motto)

Balled up and ready to bake

5. Place dough on baking parchment paper-lined baking sheet in a ball. I had some leftover V-day M&Ms lying around, so I speckled the dough ball with them prior to baking

For some perspective, I paired him with a pumpkin kiss....he was massive

6. Bake for about 15 minutes. Although Mr. Cookie will appear soft, let it cool completely on the tray (after removing from the oven) and it will firm up nicely

Yummy, yummy

Best way to spend a Sunday in the kitchen

And when not in the kitchen (or the yoga studio) I spent time on Sunday gushing over the two Bernese siblings that showed up at the dog park. Bax rushed them immediately, which I also loved [note: the little bob on the left is Bax]


Sunday, February 24, 2013

O.M.V[alentine]...Spreading the Love Part 2

And just when you thought Valentine's Day was over, I'm back with part 2! 

In my last post I shared my plans to grab Valentine's Day by the hearts and glitter and embrace all the lovey-mushiness it had to offer. And so I went for. I was all in and not missing a beat! And, since I lucked out and V-day coincided with my last federal holiday til Memorial Day (I hate this lull in the year) I was OKC bound by mid-afternoon for a long weekend and part 2 of my Valentine's festivities. 

I kicked off the day with a Valentine's themed ensamble, complete with fun socks that I couldn't wait to show off at airport security

After a delightful, non-stopped flight on my favorite airline (SW), which came complete with free in-flight wine (or any drink of one's choosing) as their gift to their valentines, I was greeted gate side (or as close as non-passengers are allowed to get to the gates in our post 9-11 world) by TF. Since I got in just in time for diner, TF had made preparations. Opting to stay in this year. TF put together a delightful spread based on his new commitment to healthy eating (which I'm LOVING, most of the time). I served as assistant so we could eat quicker, and because I still can't seem to grasp the concept of a sharp knife, I promptly sliced my thumb, unleashing hysterics as the blood began to crown. TF was moderately unsympathetic, but he did quickly acquire band aids to remove the blood from my sight (I hate the sight of blood). I rallied and soon dinner time was upon us.

It was an assortment of my favorite things: color, mashed sweet potatoes, and wine

TF sent the recipes to me and I decided to share my favorite one. It was so good I not only miss it already, but I hope to make it again very soon. It thrills me that TF and I are having more of an overlap in the foods we consume, finally!

Orzo Salad


Ingredients
Makes 6-8 serving
Based on this Food Network Version
  • 1 1/2 cups orzo
  • 1 medium yellow squash, sliced and halved
  • 1Tbsp lemon zest
  • 1 Tbsp fresh lemon juice
  • 1 cup quartered grape tomatoes
  • 1/2 cup crumbled feta cheese 
  • 1 cup peas and carrots (we used frozen, but fresh would work too...carrots would just need to be cooked longer)
  • 2 Tbsps olive oil
  • 1/4 cup chopped fresh parsley leaves
  • 1 tsp kosher salt

Preparation
1. Combine 3 cups water, orzo, 1 tsp salt, and lemon zest and bring to a boil in a large saucepan 

2. Reduce the heat to medium, add squash, peas and carrots. Cover and cook, stirring occasionally, for 10 minutes

3. Uncover and continue cooking, stirring frequently, until the orzo is tender and the liquid is absorbed, 2 to 3 minutes. Remove from the heat

4. Stir in 2 Tbsps olive oil, tomatoes, parsley, and lemon juice. Season with additional salt and pepper. Plate and top with feta.


And because I didn't cook any more during my trip, I present to you the rest of my Valentine's weekend, as told through iphone pictures:

TF gifted me with two of my favs: Godiva chocolates and wine

On Saturday we took a mini-road trip to Kansas City. We're basically roadtrip masters by this point.

Colorful Mexican fare for lunch, because I've all but given up finding good Mexican food on the east coast

Dinner was AMAZING. I kicked things off with a fun beverage: the Razzle Dazzle (best name ever!!) I loved this place (Beer Kitchen).

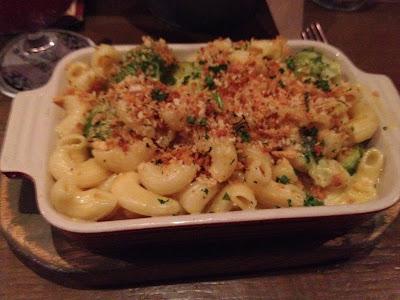
Build your own whole wheat mac and cheese (I added brussels sprouts, because I love them almost as much as I love mac and cheese). Best menu idea ever.

And TF shared his sweet potato fries (my other food love/obsession) with me

And because I love a good photo op, I leave you with this gem from our trip to the outlet mall. Hey Amelia!


Wednesday, February 20, 2013

O.M.V[alentine]...Spreading the Love Part 1

Just when you thought I was dead, I'm back in the kitchen [and on the blog]! Since my last post I took to my bed for a bit, not because of my impending birthday and march towards 30, but for actual sickness. Thankfully, it was just a cold rather than the flu, so I recovered (more or less) fairly quickly. Ever since law school I've sworn by flu shots. I had my first and only bout with the flu during my first year of law school and thought it would be the death of me. Ever since then, despite my hatred of needles, I've made myself take the plunge each year. Nonetheless, after a week of feeling awful I was back to moderate health just in time for Valentine's Day festivities. 

Last year I shared with you my disdain for all that is Valentine's Day in a series of posts dedicated to baking for some of my favorite people. This year, I decided to put a new spin on things. I grabbed Valentine's Day by the hearts and said "bring it!" I was committed to going all in this year: hearts, glitter, and love runneth over! I warned TF about my new outlook on the day of love and he accepted my "trial run," as I took to calling it, anxious to see if I was capable of being a "real" girl [I should caveat that these are my words, not his]. So, without further ado, I present to you, my first attempt at embracing Valentine's Day as though I have a heart the size of Texas!

Kicking the spreading of love and glitter off, I went crazy during a weekend trip to Michael's. Mother and I love a good trip to Michael's. We are at our best during the Christmas season, but stumbling onto a good Valentine's Day sale was a close second. I stocked up on all kinds of craft-making fun and could not wait for my projects to begin. 

Post-shopping. Valentine's craft goodies runneth over


As per usual, I had grossly underestimated the amount of time I had to complete my gifts. Sadly, my carefully laid plans always end in a crazed furry. This time wasn't nearly as bad as Christmas, but between still being on the mend and flying to OKC on Valentine's afternoon, I often worried if there were enough hours in the day. But alas, in true Gian form, I rose to the occasion and assumed the role of Valentine's Santa in the officina and among my friends. 

My favorite way to deliver holiday cheer: seasonally appropriate goodie bags. If I liked children I would've followed in mother's footsteps and been an elementary school teacher. 


First treat in the goodie bag: Golden Oreo Truffles


Ingredients
Recipe courtesy of Sally's Baking Addiction

  • 1 package (8 oz) cream cheese, softened
  • 1 package Golden Oreos, finely crushed
  • 1 bar of white baking chocolate (or almond bark as it's sometimes called on the package)
  • Festive sprinkles
Preparation

1. Break Oreos into quarters and combine with softened cream cheese in food processor. Blend until well combined.


I may or may not have eaten several of these as a cooking snack....
  
Ready to blend away

2. Shape into balls and place on a plate or parchment clad baking sheet and freeze for at least 30 minutes. Because I insisted on eating several of the Oreos as a baking snack, my dough was a little mushier than it should've been. The time in the freezer was a miracle worker! 

3. Once dough has hardened, but prior to removing balls from the freezer, melt white chocolate in a microwave safe bowl according to directions on package.

4. When chocolate is ready, remove dough balls from freezer and dip one at a time into chocolate. Top with sprinkles immediately after removing from chocolate and place on wax paper until hardened. Store in fridge.

Perfection

Next on the list was a twist on a new favorite. I made these DELICIOUSLY ADDICTING peanut butter cookies again, but instead of incorporating chocolate chips, I topped with milk and dark chocolate candy hearts as soon as they came out of the oven. 
Peanut Butter and Hearts

I made these last during a whirlwind night of baking and my kitchen was a thousand degrees, so they had to be rushed to a cooler part of the apartment in order to cool properly. It was touch and go if they'd make it, but they rallied into the yummy goodness I knew they were capable of.

Once cooled it was time for packaging

Some went in the treat bags to my friends, but the majority go wrapped up in this heart shaped bowl as a gift for m papa. He always makes sure sister and I have a valentine (and he was forced to haul me to and from the airport) so I wanted to include him in my holiday baking.

And last but not least, it just wouldn't be Valentine's Day if I didn't break out the V-day M&Ms. As the finishing touch on my treat bags, I made:

Double Chocolate M&M Cookies

Ingredients
Adapted from this version
  • 2/3 cup semi-sweet chocolate chips
  • 1/2 cup white chocolate chips
  • 1 cup all purpose flour
  • 1/4 cup Hershey's Dark Cocoa
  • 1 teaspoon baking soda
  • 1/2 teaspoon salt
  • 1/2 cup (1 stick) butter, softened
  • 1/2 cup light brown sugar
  • 1/4 cup granulated sugar
  • 1 large egg
  • 1 teaspoon vanilla
  • 1 cup Valentine M&Ms
Preparation

1. Preheat oven to 325 F

2. Place 2/3 cups chocolate chips in a glass container and microwave at 30 second intervals until fully melted, stirring in between. Set aside

3. In a stand mixer combine flour, cocoa, baking soda and salt on low until well blended

4. Add butter and sugars and mix for 1 minute

5. Pour in the melted chocolate, then add egg and vanilla, mix well

6.Add the white chocolate  chips and mix on low until fully incorporated

7. Then add M&M's and mix gently by hand 

8. As I've mentioned in my last couple cookie posts, I'm obsessed with chilling my dough before baking. So, chill dough for 30 minutes in refrigerator ..or if you're in a hurry in the freezer for 15 minutes

9. Scoop teaspoon-sized balls on greased baking sheets about 2 inches apart

10. Bake at 325F for 10-12 minutes or until the tops have begun to crack and a tooth pick inserted in the middle comes out with moist crumbs


Stay turned for part 2 coming soon....the V-day love continues!


Sunday, February 3, 2013

Hark the Raven

Happy Super Bowl day all! I'd be lying if I said I was overcome with excitement and anticipation for the arrival of this day. As a lover of football, I'm always partly sad when the Super Bowl finally comes as I know the countdown to September is officially on and I must prepare to weather the long, seven month stretch until football returns to my life. It pains me to even think about the long, hot, football-less summer that lays before me. I also rarely have a cheering stake in the game. This year I'm a little more invested than usual as I've always considered Baltimore my adopted homeland, but since my team (the Dallas Cowboys) haven't made it to the super bowl since the days of my youth, I lack the level of enthusiasm of many of my relatives over this evening's game. 

With that being said, I will still be adorning purple and black at the super bowl party I'm heading to this afternoon and, more importantly, I will be using the opportunity to unveil two new Oreo-infused recipes. So excited!

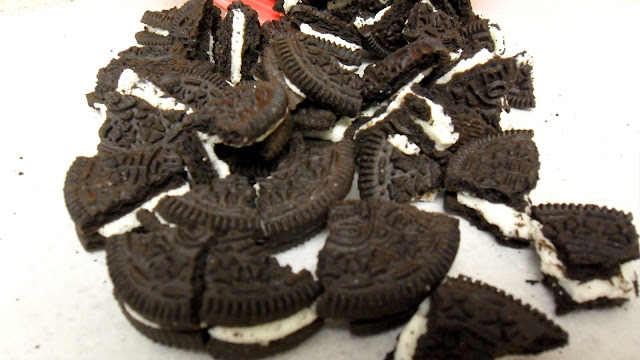
Oreos are one of those things that I always forget how much I love until I encounter them, like Cheetos. Actually scratch that, I think about Cheetos far too regularly for a person of my age and eating habits. I can't even keep those little orange devils in the house. Although I manage to forget about Oreos for long period of times, lately I've been dying to incorporate them into my baking. And finally the opportunity was has arrived! I present two you, two amazing uses for Oreos:


Chocolate Chip Oreo Cookie Bars


Ingredients
Adapted from Picky Palate
  • 1 stick unsalted butter, softened
  • 1/2 cup granulated sugar
  • 1/2 cup packed light brown sugar
  • 1 large egg
  • 1 tsp vanilla extract
  • 1 1/2 cups all purpose flour
  • 1/2 tsp baking soda
  • 1/2 tsp kosher salt
  • 1 cup mini chocolate chips
  • 12 Oreo cookies, crushed
  • 20 Hershey’s Kisses, unwrapped


Preparation
1. Preheat oven to 350 degrees F and cover an 8×8 inch baking pan with foil
2. In a large bowl, combine butter and sugars until well-blended, at least 2 minutes
3. Add egg and vanilla, mixing to combine. Then add dry ingredients, chocolate chips and Oreo cookie pieces, stirring to combine
4. Press 1/3 of the dough into the bottom of the prepared baking pan

5. Top with 4 rows of Hershey’s Kisses 5 per row
6. Top with remaining dough and gently press to cover all kisses
7. Bake for 25-30 minutes, until lightly golden. Let cool for 30 minutes, cut into squares and serve

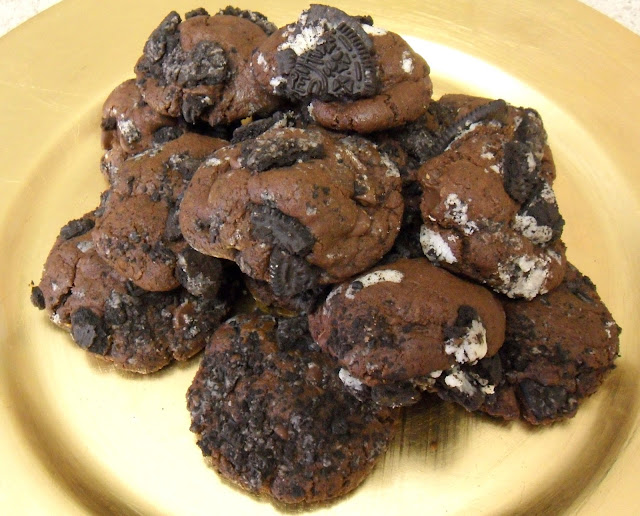
Double Chocolate Oreo Cookies

Ingredients
Inspiration found here

  • 1 cup all purpose flour
  • 1/2 cup unsweetened cocoa powder 
  • 1/2 tsp baking soda
  • 1/2 tsp salt
  • 4 ounces coarsely chopped semisweet chocolate
  • 1 cup semi sweet chocolate chips
  • 1/2 cup unsalted butter, sliced
  • 1 1/2 cups sugar
  • 2 large eggs
  • 1 tsp vanilla extract
  • 12 Oreo cookies, crushed

Preparation
1. In a medium bowl, whisk together flour, cocoa powder, baking soda, and salt; set aside

2. Melt coarsely chopped chocolate and butter slices in a small pot over medium heat, stirring frequently

3. Combine melted chocolate/butter in a large mixing bowl with sugar, eggs, and vanilla. Beat at medium speed until combined

4. Gradually add in flour mixture thirds, mixing after each batch and then until well combined. Fold in chocolate chips and chill dough for at least 20 minutes. [I'm obsessed with chilling the dough now, it makes such a difference]

5. Preheat oven to 325 and cover a baking sheet with parchment paper 

6. Using a tablespoon, scoop out dough, roll into balls, and roll balls in Oreo crumbles, repeating until all dough is gone

7. Place dough balls 2 inches apart on baking sheet and bake for 8-10 minutes (depending on size). Make sure not to over-bake as it will cause the cookies to dry out. Cool on wire racks when done

Enjoy!