Pages

Sunday, August 26, 2012

Farmers Market Veggies + Pasta

Sometimes I amaze myself. This amazement has occurred in various aspects of my life and in both good and bad ways. Case in point: during a weekend at home a couple of weeks back, I discovered a collection of old journals. I've always loved writing and during several points over the years I've kept track of the happenings in my life. Reading through these now, almost 15 years later, has been both entertaining and enlightening. I knew I was a complete nerd, and somewhat if a tomboy, during my high school years, but reading through my life and times during the summer of my 14th year really gave me a newfound appreciation for how far I've come. Embarrassing confession: I once excitedly asked a boy crush what his favorite football team was. Seriously. Oh little teenage Gian...

Similarly, I feel as though I've experienced similar growth in my cooking abilities. Since starting this blog, I've tried my hand at a variety of recipes, many of which were way outside the scope of my traditional cooking comfort zone. And, with each success, my confidence began to grow. Last week, I took my confidence to another level with this creation. It was farmers market pasta perfection!

Brussels Sprout-Tomato Pasta with Olive Oil and Garlic Sauce


Ingredients
[Inspiration found here]
  • 3 cups of pasta (I choose penne for the occasion)
  • 1/2 cup extra virgin olive oil + 2 Tbsps
  • 3-5 cloves of garlic (minced)
  • 6-8 fresh brussels sprouts (rinsed and halved with stems and loose leaves removed)
  • 10-12 cherry tomatoes (sliced)
  • 1 Tbsp Italian seasoning (mine is a combination of basil, oregano, and thyme)
  • Salt and pepper to taste
  • Shredded Italian cheese for topping (optional)
Fresh produce ready to be eaten

Always forget about my over the sink strainer/cutting board

Preparation

  1. In a large pot, bring to a boil 6 quarts of salted water. Add pasta and cook until al dente, about 6 to 8 minutes
  2. Meanwhile, warm 2 Tbsps of olive oil in wok over medium-low heat. Add brussels sprouts (halved) and cook until lightly browned (turning frequently)
  3. At the same time, in a large saute pan, heat 1/2 cup olive oil over medium heat. Add the garlic and Italian seasoning; saute until light brown and fragrant
  4. Drain pasta, reserving 2 tablespoons of the pasta water. (The reserved pasta water will help create the sauce). Do not rinse pasta with water
  5. Add the reserved pasta water to the garlic and olive oil mixture and stir to combine
  6. Toss pasta and cooked brussels sprouts with sauce until covered. Top with tomatoes and warm. Top with cheese (if desired) and serve

Love the smell that fills the house when cooking with garlic


Brussels sprouts are one of my randomly discovered favorite foods

Monday, August 20, 2012

Chocolate Chocolate Cookies

Many years ago, circa 2004, when I got my first apartment during my sophomore year of college, I was convinced there were certain things that I needed to make it feel complete. Among these were the basics: furniture, dishes, etc. And then there were the "fun" items. To this day, the "fun" item that stands out the most is a cookbook I found while browsing books at Goodwill. It was in near perfect condition and entirely devoted to one of my favorite things in the world: cookies! There's no way I wasn't buying it. 


If there's one thing I love in a recipe, it's a nice, colorful picture. I think that's why I was sucked into Pinterest so quickly...all the pictures mesmerize me! 

Unfortunately, since acquiring this book 8 years ago, I have maybe made one recipe out of it. Yes, you heard me correctly. I've made one out of 1,000 cookie recipes. The poor book has mostly been moved from kitchen to kitchen, and thousands of miles across the country but has yet to truly fulfill its life's purpose. Today, I took a step towards fixing that.

I'm off to Oklahoma next week for Labor Day weekend and had considered playing a little game with myself until then--no desserts. That game lasted, as it typically does, an incredibly short amount of time (until about 4:00 this afternoon). I was simply not meant to go dessert free. And so, I broke out my long-neglected cookie cookbook and began to scout.

As with most of my recipes, the one I settled on was driven by my current desire for double chocolate chip cookies. I've never attempted these and was hoping against hope that I could get them to rise to the level of the one that I often get from one of my favorite bakeries. For my first time out of the gate with these, I think I came pretty close! 


White Chocolate Biggies
[Adapted from The Great American Cookie Cookbook]


Yummy, yummy

Ingredients

  • 1 1/2 cups unsalted butter, softened
  • 1 cup granulated sugar
  • 3/4 cup packed light brown sugar
  • 2 eggs
  • 2 tsp vanilla
  • 2 1/2 cups all-purpose flour
  • 2/3 cup unsweetened cocoa powder [I'm obsessed with Hershey's Special Dark]
  • 1 tsp baking soda
  • 1/2 tsp salt
  • 1 package (10 ounces) white chocolate chips
The picture that caught my eye

Ready to go in the oven

Preparation
  1. Preheat oven to 350F. Lightly grease cookie sheet or line with parchment paper
  2. Beat butter, sugars, eggs, and vanilla in large bowl until light and fluffy. Combine flour, cocoa, baking soda, and salt in medium bowl; blend into butter mixture until smooth. Stir in white chocolate chips
  3. Drop dough by 1/3 cupfuls onto prepared cookie sheets, spacing about 4 inches apart. Press each cookie to flatten slightly
  4. Bake 12-14 minutes or until firm in center. Cool 5 minutes on cookie sheet, then remove to wire racks to cool completely

Thursday, August 16, 2012

Krazy for Kale

Oh my kale. I am officially addicted. Up until about a month or so ago, I had never paid kale much mind. It was just one of those green leafy vegetables  that was not my cup of tea (which at this point in my eating journey is really saying something as there are little to no vegetables that I don't like....tell that to my 5 year old self and I'd call you a liar and probably kick you in the shin) and I was ok with that. And then it caught my eye. 

I don't remember how our paths first crossed (my guess is pinterest or twitter) but with so many delicious-looking recipes using it, I quickly became obsessed with giving it the old taste test. I did so for the first time courtesy of a farmers market impulse buy and used it to make these kale chips, but I wasn't officially sold until I tried it raw. 

Even when it's not summer, something inside of me has always loved raw foods. When I was younger, I used to hover in the kitchen as my mom made dinner and beg for samples of bell pepper and frozen corn (as an aside, a small dish of frozen corn with salt and pepper on it is still one of the best snacks ever....I'm currently wondering why I don't have it more :)). So naturally, I had to try kale raw in order to determine my true feelings for it. Thus, with the remaining kale I made a salad to take to work for lunch. It was divine. I drizzled it with olive oil as many recipes suggested to soften it up a bit and topped it with some cucumber and tomato pieces (also courtesy of the farmers market). It was a nice change up from my usual spinach regimen, and with that my addiction began.

Only a week out from my first kale encounter, I found myself at the farmers market again (a different one that I'm now also obsessed with...I raved about this one here) and, because this farmers market was the cheapest place on earth (admittedly a slight exaggeration, but definitely cheaper than what I've grown accustomed to in the District) I acquired a HUGE bag of kale for $2. My mom was not thrilled with my purchase as it took up a lot of room in the refrigerator while I was in town, and on a weekend when we were already storing a bunch of extra food for our crab feast, but as I repeatedly reminded her, how was I going to pass up $2 kale?! 

Once I returned back to the District the fun part came, deciding what to do with all of it! Thanks to one of my favorite inventions, the interweb, I was not short on ideas. Unlike the previous recipes I've featured on here, all of those mentioned below were made measurement free and were instead the result of me finding pictures of food that looked appetizing and then playing around in my kitchen to see what I  could come up with. As such, I've just provided a rough idea under the pictures of what I did to create the finished product. I encourage you to have some fun in your kitchen with kale as well. And now, I present to you my week with kale:

Sauteed Kale, Fairytale Eggplant, and Tomato Pasta


Sauté eggplant in olive oil with salt and pepper and a cup of diced tomatoes until tender/heated through. Toss with kale. Cover and allow to simmer for several minutes until kale begins to wilt

Kale + Wine = Perfection

Avocado and Kale Salad

Dice half an avocado and toss with kale, tomatoes (I'm obsessed with farmers market tomatoes), cucumbers (diced), lime juice, and salt and pepper to taste

Kale Pesto

Combine kale, olive oil, sunflower seeds, several cloves of garlic, and salt and pepper to taste/desired consistency


Sauteed Kale with Quinoa and Fairytale Eggplant

As you can see from my reuse of the fairytale eggplant, kale wasn't the only thing I had an abundance of

This recipe was made similarly to his brother above, but with some veggies added instead of the tomatoes

And in case there was any doubt as to how much kale I was actually working with:

In the beginning, my kale supply runneth over. Seriously, $2 for the whole bag!!

The remaining kale, after I made all of the above, except the pesto, plus several lunch salads!


Tuesday, August 14, 2012

Steamed Crabs with a Side of Potato Salad

Spending summers in Maryland growing up, I developed a love of steamed crabs at an early age. When we were really young my grandfather and dad would open the crabs for us and help us get started, but it wasn't long before I was working my way through crabs on my own from start to finish. As an adult, I continue to work to perfect my technique, trying to remove the shell as carefully as possible, leaving large clumps of the succulent crab meat in tact.


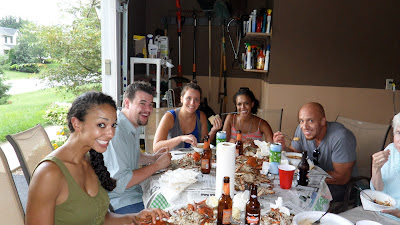
As I mentioned yesterday, every August my family has turned out annual steamed crab feast into a birthday extravaganza. Since this is somewhat of an all day affair, we need to have more than just crabs and three cakes to feast on. Enter the side dishes.

This year my grandmother started things off with her famous (at least in our family) crab soup. Mother and I were responsible for the remainder of the sides, all which ended up being fresh from this delightful farmers market we discovered by my parents' house. This place was like an adult toy store for me! It's located on the farm where everything is grown and the store front is a giant (albeit modern and air conditioned) barn. And, just when I thought I couldn't get any more excited, their prices were actually cheaper than the grocery store! Seriously, this place was amazing. If you're ever in Baltimore, paying a visit to Richardson Farms is not a bad way to spend a Saturday morning.

One of my finds at the farmers market was a bag of red potatoes, which I used in recreating another of my grandmother's recipes, potato salad. I'm very particular about my potato salad. Among other things, I don't care for mayonnaise and prefer red potatoes with the skins on for a burst of color. I'd made this recipe once before this summer, for my family's belated 4th of July cookout and it was a huge success that I hoped to recreate this time around.

Grandmom's Potato Salad

[This is one of those shameful times when I failed to actually photograph the featured recipe, so I'm relying on a stock photo from our 4th of July cookout where this recipe was made for the first time. It's pictured above in the bottom right corner :)]

Ingredients
  • 3lbs red potatoes (washed and chopped into pieces with skins on)
  • 6 hard boiled eggs (peeled and diced)
  • 1/2 cup chopped onion
  • 3/4 cup chopped celery
  • 1/2 cup sweet pickle relish
  • 1/2 tsp celery seed
  • 1 tsp mustard
  • 1 cup of mayonase (I used the low fat olive oil version)
  • Salt and pepper to taste
Preparation
  1. Fill pot with water and chopped potatoes. Bring to a boil and cook until desired level of tenderness. Drain and allow to cool
  2. At the same time, bring a smaller pot of water and 6 eggs to a boil. Allow to boil uncover for 10 minutes, then cover and remove from heat for an additional 10 minutes. Rinse with cold water and allow to cool in the refrigerator
  3. Once potatoes have cooled, combine with onion and celery
  4. In a smaller bowl, mix remaining ingredients (sans eggs) with a whisk
  5. Pour mixture over potatoes, onions, and celery. Mix until potatoes are evenly covered
  6. Once eggs have cooled, peel and chop, then fold into the potato salad
  7. Chill for approximately an hour (I allowed mine to cool overnight) and serve
Happy Final Days of Summer!

Sister, her posse, and I

The family 

The parents


Monday, August 13, 2012

August Birthday Extravaganza

Well another month is nearly half over and I don't know where the time has gone?! Last week flew by, although thanks to a busy weekend and some late nights cheering on the US of A in the Olympics, it felt dreadfully slow as I drug my half asleep self through it. On the bright side, it was my first week in my new job (it's not entirely new as I'm just on a different floor in the same building, but I do have a new team and a new project, both of which were much needed) and I'm already loving my new role 1000x more than the previous one! Because of the changes at work, I was busier during the day and incredibly exhausted in the evenings, causing me to take a brief hiatus from blogging. But, after several restful days over the weekend, and the return of my beloved work from home Mondays, I'm back!

August is birthday month! Sadly, my birthday isn't part of the festivities, but I have so much fun with everyone else's it sometimes feels like it's my birthday as well. Two weekends ago was our annual birthday crab feast. My Grandmom, sister, and dad's birthdays all fall in August. As such, we've made it a tradition over the past couple years to get our summer bushel of steamed crabs as part of the celebration and have one big joint birthday party. And because I believe everyone should get their dessert of choice on their birthday, we always have three cakes :)

Last year, I assumed my Grandmother's role of making sister's birthday cake. Since we were kids, sister has always requested that Grandmom make her a pineapple upside down cake for her birthday. Last year, however, Grandmom passed the reigns (and the recipe) onto me. I was scared, but I did it. This year, having become a budding cook/baker, I decided to take the recipe up a notch, making the cake from scratch (instead of the jazzed up boxed version Grandmom's recipe called for). It was tense. Never before have I so feared failure.

On top of that, I've been ensuring my dad spends each birthday with his beloved pound cake for as long as I can remember. It started many years ago with me purchasing a store made pound cake and progressed to me making a boxed cake, and then finally adopting a from scratch version last year. This year, wanting to jazz things up a bit (and use the new poppyseeds I got at the Amish market a few weeks ago), I whipped up a lemon poppyseed number. Very refreshing on a hot August day!

Despite my tensions with how my creations would turn out (sister had several friends in attendance as well, adding to my need to succeed at baking), my cakes were a hit! And, I ended up loving the yellow cake recipe I used for sister so much that I used it again to make cupcakes for Cait and Andrew's joint birthday fiesta this weekend. August birthdays runneth over in my life and the month isn't even complete yet!

Pineapple Upside Down Cake


Ingredients
  • Yellow cake (I officially swear by Smitten Kitchen's version...and I'm a huge yellow cake fan/connoisseur) 
  • 1 can sliced pineapples in pineapple juice (the syrup-laden ones creep me out)
  • 6-8 fresh cherries (pitted and sliced in half)
  • 1 cup brown sugar
  • 1/4 cup butter or margarine 
Preparation
  1. Preheat oven to 350F. Melt butter in the cake pan
  2. Once butter is melted, dump brown sugar into cake pan and stir into butter until smooth
  3. Lay pineapples on top of the brown sugar mixture
  4. Mix cake according to recipe and then pour batter over pineapple/brown sugar mixture
  5. Bake on 350 for 30-40 minutes or until a toothpick can be pulled out without dough attached
  6. Let cake cool (I usually let it go over night just to be sure), then turn pan over to flip the cake out so the pineapples are on top
  7. Place the cherry halves in pineapple holes and serve!

Lemon Poppyseed Cake


Ingredients
[Inspiration found here]
  • 2 sticks (16 Tbsp) unsalted butter
  • 1 ½ cups cake flour
  • 1/3 cup poppy seeds
  • 1 teaspoon baking powder
  • 1/2 teaspoon table salt
  • 1 ¼ cups granulated sugar
  • 2 tablespoons grated lemon zest plus 2 teaspoons juice from 2 medium lemons
  • 4 large eggs
  • 1 1/2 teaspoons vanilla extract
  • Powdered sugar for dusting (optional)
Preparation
  1. Preheat oven to 350 F. Grease bottom and sides of one 9 x 5-inch loaf pans; dust with flour, tapping out excess
  2. In a medium bowl, whisk together flour, baking powder, and salt; set aside
  3. In a small bowl, toss 1 tablespoon of the flour mixture and poppy seeds together, set aside
  4. In a microwave-safe bowl, microwave butter at full power until melted, about 1 to 2 minutes. Whisk melted butter thoroughly to reincorporate any separated milk solids
  5. In mixing bowl, mix sugar and zest until combined, about 5 seconds. Add lemon juice, eggs, and vanilla; mix until combined, about 10 seconds. 
  6. With mixer running, add melted butter in steady stream
  7. Sift flour mixture over eggs in three steps, whisking gently after each addition until just combined. Fold poppy seed mixture into batter after flour is incorporated
  8. Pour batter into prepared pan and bake 15 minutes. Reduce oven temperature to 325 degrees and continue to bake until deep golden brown and skewer inserted in center comes out clean, about 35 minutes, rotating pan halfway through baking time. Cool in pan for 10 minutes, then turn onto wire rack
  9. Using a wire shifter, dust with powdered sugar prior to serving (the original recipe also included a nice recipe for a lemon glaze, but since papa doesn't care for icing of any sort, I always just stick to powdered sugar)
(Today is Papa's real birthday)

I was allowed to be an honorary birthday person (it was also my 5 month birthday) 
as my reward for all my hard work in the kitchen

And as referenced above, the yellow cake recipe was used again to make cupcakes for Cait and Andrew, complete with my favorite buttercream frosting, with a splash of cocoa powder...in measuring terms, about 1/3 cup :)


Wednesday, August 1, 2012

To Nutella With Love

Dearest Nutella,


      I can't believe I resisted you for so long. Whether it was months or years, I no longer know. Whatever the case may be, I am filled with shame. In part I blame the fanfare that surrounded you. It wasn't your fault, I know, but I'll be honest, I feared you were overrated and poised to disappoint me at first bite. While I'm told some have been consuming you in an array of ways for years, it seems only as of late have you begun your rise to prominence and subsequently, the journey to my heart.


       When I finally decided to take the plunge, I was filled with mixed emotions: excitement, trepidation, fear, and angst. Then, as I summoned my courage and took the first bite of my shortbread cookie with your ridding on top like a king, I was nothing short of elated. 


        It's been a few weeks now since our first meeting and in that time I have come to appreciate both your versatility and the joy you bring me with each encounter. It was from this joy that I was inspired to write this note to you, dear chocolately-hazelnut friend. Thank you for being so smooth, creamy, and always satisfying. I raise my nutella clad cookie to you!

Love, 
Gian

Sugar Cookie Nutella Sandwiches


Ingredients
  • Sugar cookie dough (I had some frozen from this recipe)
  • Nutella


Preparation
  1. Preheat oven to 375 degrees F
  2. Prepare cookie dough according to recipe or defrost dough (like I did....oh, and if you go this route, don't preheat oven until ready to bake as defrosting takes a couple hours)
  3. Bake cookies for 8 to 10 minutes in the preheated oven, or until slightly golden (I prefer a softer cookie). Let stand on cookie sheet two minutes before removing to cool on wire racks
  4. After cookies are cool (I found this to be an overnight process, due in part to the fact that I started later in the evening), spread the Nutella on the backside of one cookie
  5. Once cookie has desired amount of Nutella on it, sandwich a cookie of similar size on top
  6. Take a big bike and enjoy. i love you Nutella!