Pages

Wednesday, March 26, 2014

Warm Recipes for the Unrelenting Cold

I love winter. I love a nip in the air. I love feeling the cold on my face as I run. I love a good coat and boots. I love not sweating every time I step outside. 

As April looms ahead, however, I'm starting to fear that as much as I love the winter season it may never leave us. Every time I turn around lately it's snowing. Sometimes Sheppie (a fellow lover of winter) looks at me with her sad puppy eyes as if to say, "what is this snowy place in which you insist we now reside....and why do you keep sending me out in the elements without my trusty sweater?!" Clearly, I've failed her on many levels.

One area that my stock is starting to tick up in her eyes is with my eating habits. Several years ago, my FOTY was vegetarianism, or more accurately, pescatarianism, but as 2013 drew to a close I began to consider a pseudo-return to my carnivorous lifestyle. I mostly blame running for this. No matter how hard I tried, I just couldn't get enough protein in me to keep from feeling exhausted whilst running. Not fun. So, come Thanksgiving, I decided to get back on the turkey wagon. It worked out well for me and I've since returned to chicken as well. I gave up turkey around the time it was growing in popularity as a substitute to beef-based, so now it's like a whole new world for me when I eat out! 

And the cooking. My cooking has been taken to a whole new level. It's like the recipe flood gates have been open and the options runneth over. I have so many recopies I'm dying to try now, there almost aren't enough days in the week! 

Since my cooking is often inspired most by the weather and my current mood, today's recipes pay homage both to the unrelenting cold and my newly discovered cooking options now that I'm back in the meat business. Get ready for a double dose of heart warming goodness. 

3 Bean Sunday Chili


Ingredients
Original recipe found here
  • One 28-ounce can diced no-salt tomatoes
  • One 15-ounce can tomato sauce
  • One 15-ounce can pinto beans, drained and rinsed
  • One 15-ounce can dark red kidney beans, drained and rinsed
  • One 15-ounce can black beans, drained and rinsed
  • 3 cloves garlic, minced
  • 1 jalapeƱo, seeded and minced
  • 1/2 small red onion, chopped
  • 1/2 small yellow onion, chopped
  • 1 cup chopped bell pepper, color of your choice
  • 1 carrot, chopped
  • 2 Tbsps chili powder
  • 1 tsp cumin
  • 1/8 tsp cayenne
  • 1/2 tsp crushed red pepper flakes
  • 1 cup white corn, fresh or frozen
Preparation
  1. Combine all ingredients except the corn into a large pot and cook over medium heat until the chili begins to boil
  2. Cover and simmer for 20 minutes, stirring occasionally
  3. Add corn and simmer for an additional 10 minutes
  4. Pour into bowls and top with cheese (mostly because I just love cheese) before serving
The colors in this meal were off the chain....

Plus I got to use my fun over the sink strainer/cutting board combo. I really don't break this gem out enough

A close second to my love of colorful foods is my love of veggies

This recipe was seriously so easy. Dump everything together at once and you're done

Can't wait to break this out for football season

Maryland Style Jambalaya


Ingredients
Original recipe found here
  • 3 Tbsp olive oil
  • 2 ribs celery, chopped
  • 1 white onion, diced
  • 1 small red bell pepper, cored and diced
  • 1 small yellow bell pepper, cored and diced
  • 1 small green bell pepper, cored and diced
  • 1-2 jalapeno peppers, seeded and finely chopped 
  • 4 cloves garlic, minced
  • 1 lb boneless skinless chicken breasts, cut into bite-sized pieces
  • 1 lb turkey sausage, thinly sliced into rounds
  • 3 cups vegetable stock
  • 1 (14 oz.) can crushed tomatoes
  • 1 1/2 cups uncooked brown rice
  • 2 Tbsp Old Bay Seasoning (this is where the Maryland aspect comes in, the original recipe called for Creole or Cajun seasoning here)
  • 1 tsp thyme, crushed
  • 1/4 tsp cayenne pepper
  • 1 lb raw shrimp, peeled and deveined
Preparation
  1. Heat 2 Tbsps olive oil in a large saute pan over medium-high heat
  2. Add celery, onion, bell peppers, jalapeno and garlic. Saute for about 5 minutes, stirring occasionally, until the vegetables are soft and mostly cooked
  3. Add the remaining Tbsp of olive oil, chicken and sausage, and stir to combine
  4. Continue sauteing for an additional 5 minutes, or until the chicken is no longer pink and mostly cooked
  5. Add the vegetable stock, tomatoes, rice, Old Bay, thyme, and cayenne, and stir to combine
  6. Reduce heat to medium-low, cover and simmer for about 25-30 minutes, or until the rice is cooked, stirring every couple of minutes to ensure rice doesn't stick to bottom of pan
  7. Once the rice is tender, add in the shrimp and stir to combine. Let the mixture continue to simmer, stirring occasionally, until the shrimp are cooked and no longer pink. When they pass the test it's dinner time!

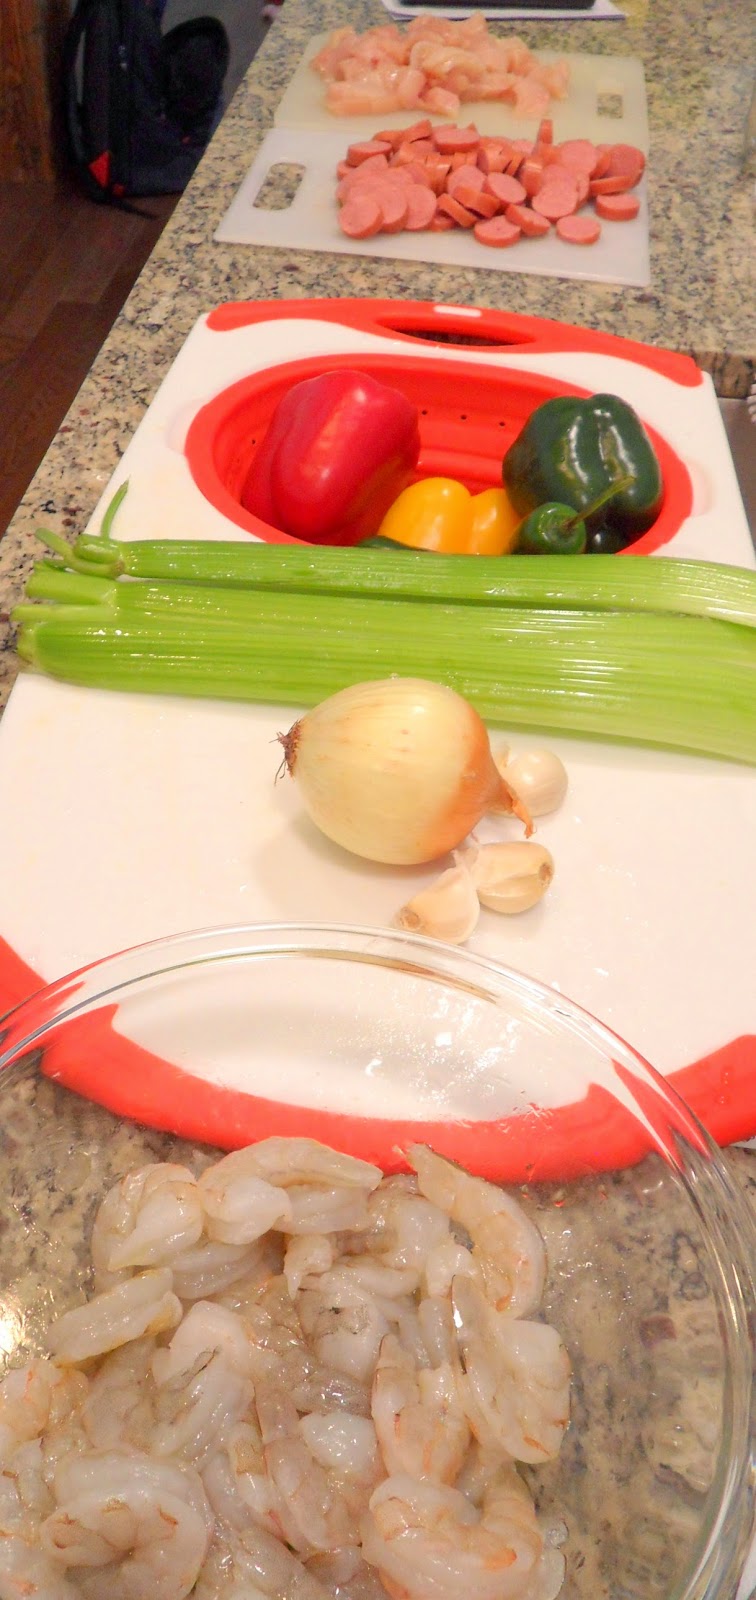
The prep for this one required LOTS of chopping....and space

This was Bax's favorite part

She basically refused to leave the kitchen until she was certain the meat wasn't coming her way

And then the fun started!

And the colors. So many colors.

Preparing to be liquefied and simmer


Monday, March 24, 2014

Eat Run Eat: Part 2

Well, I'd intended this post to be a tad bit closer to the last one, but better late than never I guess.

Honestly, as long as it seemingly took my legs to recover from race day, it seems fitting that my recap of the day is stretching on as well. This week I'm back to running, but also still thinking about these fabulous St. Patty's Day themed brownies that I made for our post-run celebration and festivities. 

As I've gushed about in the past, I love, love, LOVE St. Patty's Day as an adult. It's quite possibly the only holiday that has gotten better with age and I look great in green. The latter statement isn't really saying much as I look great in most colors (sorry, but I speak the truth), but as so many of my childhood joys have been taken from me with age, it's nice to have this to hold onto, plus the Irish part of me really just loves a day devoted to drinking. 

In that vein, I often like to take the opportunity to give my baking an extra kick by infusing it with alcohol as well. Years ago, during one of my first St. Patty's Days in DC I first tried my hand at alcohol-infused baking. I was still a novice baker at the time though, so I added Bailey's to boxed brownies. I had evolved into making my own frosting by that point, so that's something, and I infused it with Bailey's as well. I remember being a little...ok EXTREMELY liberal with my measuring of the alcohol additive and the finished product was very strong to say the least. Since I've progressed past boxed brownies, I was super excited to put my new skills to the test with this year's creation. 

About a month ago I found a fabulous brownie recipe. If you've ever tried making brownies from scratch you know it's incredibly hard to get the same gooey consistency that you get with boxed brownie mix. This is a huge issue for me because the fat girl inside of me loves her some half-baked brownies (and brownie batter too for that matter). A little over a year ago I found this recipe that had been my go to when I wanted to woo people with my brownie-making skills...or when I wanted a good brownie. But then about a month ago I found another one that blew my socks off. I tried it out on my coworkers and it was a huge hit with them as well. It's not ready for the big blog reveal yet as I want to tweak it a little first, but for now this recipe isn't too shabby either.

Bailey's Brownies with Bailey's Buttercream


Ingredients

Brownies
Original recipe found here 
  • 1 stick unsalted butter
  • 3 squares Ghirardelli baking chocolate
  • 2 cups sugar
  • 2 eggs
  • 1 cup flour
  • 1 tsp vanilla extract
  • 1/4 cup Bailey’s Irish Cream Liqueur

Buttercream
Original Recipe found here
  • 2 sticks unsalted butter, at room temperature
  • 3 cups powdered sugar
  • 4 Tbsps Bailey's Irish Cream
  • 2 teaspoons vanilla extract

Preparation
  1. Preheat oven to 350 and grease baking pan (I used an 8x8 pan so they were nice and thick)
  2. For brownies, melt butter and baking squares in a microwave safe bowl. This should be done at 30 second intervals (stirring in between) to avoid overcooking the chocolate
  3. In the mixing bowl, cream melted butter and chocolate mixture, then add in sugar and vanilla. Beat until fluffy, about 2-3 minutes
  4. Add in eggs, beating one at a time, flour, and stir just until combined. Stir in Bailey’s
  5. Pour into greased baking dish and bake for 35 minutes f you prefer a gooey center, and 5-10 minutes longer if you want them to be a little more sturdy
  6. After or while brownies are cooling (I prefer an overnight cool time), cool butter to room temperature. I never plan enough ahead for this to happen naturally, so I usually stick it in the microwave for 15 seconds
  7. Once butter is softened, mix with remaining ingredients until smooth and creamy. Spread lavishly over brownies...and if you're feeling fun, add some festive sprinkles to round things out
 
Happy [slightly belated] St. Patty's Day!

Sunday, March 16, 2014

Eat Run Eat: Part 1

I've never been what one would call a serious runner. I run out of a desire to stay in shape rather than any actual love for the craft. For the most part I waiver between hating running and growing accustomed to its face, but alas, like the masochist I am, I continue to return to the run.

In my early years of running, my focus was on doing several races a year. As my interest has waned in recent years, so too has my yearly race count, but one constant has remained: my yearly appearance in the DC Rock and Roll Half Marathon. 

I first did this race in March of 2011. Having lived in the District for almost a year at that point, I still loved everything about the city and was excited to do a run that took place in my backyard. The course has evolved in recent years, as too have my feelings for the District, but even with my still-recentish move to Baltimore, I couldn't help but sign up for the race that's become my favorite St. Patrick's Day tradition for the 4th straight year.

One of the things that keeps me coming back to this race, masochist tendencies aside, is the food. So much wonderful food goes into the pre and post race process that I can't quite turn my back on race-life just yet. By now, this blog has been around long enough that I've been able to share a couple of my pre-race meals. In 2012 I whipped up this easy, 10-minute pasta sauce for my pre-race fuel and last year I returned to an old favorite. This year, I decided to be adventurous and try something I'd been wanting to do for a while: crockpot pasta sauce. 

Even though I work from home on Fridays now, I usually don't have a ton of time to devote to dinner prep. I also had to turn in fairly early as I prefer to sleep in my own bed pre-race, and thus would have to head down to DC on Saturday morning. Enter my trusty crockpot.  We've been together only slightly longer than I've had this blog and during that time I've found myself coming to love him, especially during the winter month. He proved to be the perfect vessle for which to create this delicious pre-race sauce [the remains of which also make a great base for pizza night].

Crock Pot Veggie Pasta Sauce


Ingredients
Original Recipe Found Here
  • 2 Tbsp olive oil
  • 1 onion, chopped
  • 3 cloves garlic, minced
  • 2 carrots, chopped
  • 1 (8 oz) package sliced mushrooms
  • 1 green bell pepper, chopped
  • 15 oz can tomato sauce
  • 2 (14 oz) cans diced tomatoes, undrained
  • 6 oz can tomato paste
  • 1 tsp dried Italian seasoning
  • 1/4 tsp pepper
  • 1/2 tsp salt
  • 2 tsp sugar
  • Pasta of choice


Preparation
  1. Cook onions and garlic in a medium skillet for 4-5 minutes or until tender.
  2. Once tender, add in carrots, mushrooms, and bell pepper and cook for 2-3 minutes.
  3. Line the bottom of the crock pot with veggies. Top with tomato sauce, diced tomatoes, tomato paste, and seasonings (salt, pepper, Italian seasoning, and sugar).
  4. Cook on high for 4 hours. Stirring periodically throughout. Remove lid after 4 hours and cook on high for 1 hour to allow sauce to thicken.
  5. Serve over your favorite pasta! 

Sunday, March 9, 2014

A Taste of Baltimore

Despite growing up in Oklahoma, I spent nearly every summer as a child in Baltimore. Because my mom was a teacher, she had the summers off as well and would load Sister and I up in our van (along with seemingly every toy we could get our hands on) and drive us out to the east coast for a couple months. Since Papa didn't have as much vacation time he would typically join us for a couple weeks at the end and then accompany us on our drive back. In the early years of this road trip (which I've done as an adult more times than I care to think about) we didn't have videos to keep us occupied and I marvel to this day how mother didn't kill us both. The mere thought of driving in a car for an extended period of time with children gives me a migraine. 

It was during these summers in Baltimore that a profound love of crabs and Old Bay Seasoning was instilled in me. During the course of our summer stay with my grandparents, there were a couple key events that I most looked forward to: trips to Ocean City, DC, and the inner harbor, swimming at my mom's aunt's house, and crab feast day. I never felt like my summer was complete until I'd picked my way through a huge pile of crabs. 

Still an annual tradition as we've gotten older, Crabs and Natty Bo

Back in Oklahoma, there was always a small piece of Baltimore in my parents'pantry: a can of Old Bay Seasoning. To this day I remain slightly amazed that we were even able to find it in local grocery stores (I do remember it being difficult at times...this was all before it became slightly more mainstream). My dad would use it throughout the year and it would always take me back to summertime in Baltimore. When I moved into my first apartment in college, it was one of the first things that I bought to stock my kitchen with and I've never been without it since.

Inspired by Old Bay's Oscar commercial debut last weekend, I decided to break out my trusty can this for an Old Bay-inspired meal. It hit the spot and helped me remember that there are a few things I love about the summer season.

Baked Zucchini Cakes and Old Bay Mac and Cheese


Ingredients

Zucchini Cakes [makes 5]
  • 1 medium zucchini, shredded
  • 4-5 asparagus sticks, chopped finely
  • 1 large egg
  • 1 cup breadcrumbs
  • 1/2 cup Parmesan cheese
  • Old Bay seasoning, to taste 
Old Bay Mac and Cheese
Inspiration found here
  • 1 cup noodles, cook according to package
  • 3/4 cup almond milk
  • 1 Tbsp flour
  • 1-2 cups sharp cheddar, shredded
  • Old Bay seasoning, to taste

Preparation

1. Prepare noodles for pasta according to package and preheat over to 425.


2. While noodles are cooking, wash and shred zucchini using the large holes on a cheese grater. Use a kitchen towel to ring out the extra moisture (it works so much better than using paper towels).


3. Finely chop a couple sticks of asparagus (I included these because I needed to use them up, but they actually gave the cakes a nice texture) and combine shredded zucchini, breadcrumbs (which I swear by making from scrap bread, especially the heels from loaves), Parmesan cheese, egg, and Old Bay in a large bowl. Mix until well combined.


4. Spray foil on baking sheet with cooking spray and then form patties from mixture and place on baking sheet. Bake for 10 minutes, then flip and bake for 8 more.


5. While zucchini cakes are baking, prepare sauce for pasta. Warm 1/2 cup of milk in a saucepan over medium heat. In a separate bowl, combine 1/4 cup milk with 1 Tbsp flour. Whisk until no lumps remain.


6. Once milk in saucepan begins to steam, add in milk-flour mixture. Whisk until it begins to thicken, 3-4 minutes. Season with Old Bay until it reaches desired taste.


7. Reduce heat to low and add in cheese, one hand full at a time, whisking in between until melted and well combined. Once all cheese is well mixed, pour cheese over cooked pasta in a large bowl and toss until well combined. 

Baltimore-inspired perfection


Monday, March 3, 2014

Plenty of Pizza

March is officially underway. Every year, almost without fail, I mentally prepare my list of favorite things about this month. In recent memory, this list has remained the same--my birthday, St. Patrick's Day, and March Madness. With so much excitement abounding this month, April can never live up. But that's a worry for another day.

No matter how old I get, I'm fairly certain that pizza will always be one of my absolute favorite foods. In my perfect world I would eat pizza every day, I love it that much. In the real world, I recognize that's not the best choice, so I've resigned myself to pizza once a week.

I don't remember how it started exactly, but at some point over the course of the last year, Bax and I started making Fridays pizza and wine night. As the work days began to get harder and longer, I began to find that I was too tired to socialize on Friday nights, preferring instead to spend the time recuperating from the week that just was. It evolved from picking up pizza at my favorite DC joint (which was also around the corner from my abode...it's one of a few things I miss about DC) to dishing up homemade takes on my favorite dish. There are really no rules, which is one of the things I find most enjoyable after an extremely taxing work week. Each week's pizza is based solely on what I'm most feeling in the mood for as I make my way across the finish line to the weekend. 

Pizza Fridays have been kicked up a notch lately thanks to two wonderful changes. First, moving to Bmore and living super close to market. Second, working from home on Fridays. These two factors combine to allow me to spend the morning thinking about what I want for dinner (I spend a lot of time thinking about food, so this in and of itself is exciting for me) and then I can actually go to the store during lunch and make my dreams a reality. Just being able to drive to the store is still something that, after 4 years of having to schlep my groceries around in a little cart, makes me so incredibly happy I can barely stand it.  

On this particular Friday I found myself recalling an instagram post from one of my favorite bloggers (and fellow Baltimorian)--Sally, a la Sally's Baking Addiction. I'm kind of obsessed with her recipes in general. They're so easy and accessible no matter what your cooking-skill level and I've yet to have something that I didn't love. She also shares my love of sprinkles. which is an added bonus. A while back she posted the fluffiest looking homemade pizza dough that I'd ever seen and I vowed to one day make it mine. 

Finally, after weeks of waiting (mostly because I kept forgetting about it) it was go time. In making this crust I was forced to exercise great patience...there's a lot of "let the dough rest" that goes into crafting the finished product, and I'm not known for my ability to relax. But I promise it's worth it. Also, fun fact, the recipe makes enough for two 12 inch pizzas, so you can freeze one for another pizza day (whereby you can skip most of the resting and just defrost the night before and go). So, when you're ready to make the best homemade pizza of your life, start with this dough and get ready for some happy taste buds!  

Pizza Heaven

Ingredients

  • Pizza crust (recipe here)
  • Sauce
  • Toppings of choice
  • Cheese for topping (I'm a sucker for a good blended number)

Preparation
 [which I'm retelling through pictures today as a fun twist]

Break out the mixer and dough hook for use in prepping the yeast

[Mr. Red rarely gets to use his dough hook, so he was in all his glory]

After yeast is ready, add flour and remaining ingredients and let the dough hook work its magic

Finished product

The instructions were to lightly coat the bowl with olive oil, but by the time I settled on a picture the oil had run to the bottom. It didn't obstruct the process so, that's all that matters.

After the magic rising process takes place, he'll look like this. I squealed a little when I opened the oven and saw how big he'd gotten!

This was my absolute favorite part. I got to punch the now-massive dough to let the air out. I was pretty much having a blast by this point.

While dough is resting yet again, and oven is preheating, prep pizza toppings. This week, I used up the remainder of my baby leeks, chopped up some spinach, and as the grand finale, took advantage of my return to white meat (that's a story for another day) and topped things off with some turkey pepperonis. 

Once dough is ready, top with sauce, toppings, and cheese before baking.

Bake and ta da! It's alive! Pizza time is here again!


Can it be Friday again already?!