Pages

Tuesday, November 27, 2012

Thanksgiving Recap: Part 2

Ok, I promise, this is my last Thanksgiving-related post. As much as it pains me to admit, fall has come and gone for another year. The ground was littered with leaves during my morning commute today and, despite the fact that I was listening to Christmas music, I cried a little on the inside. But, I have saved (in my not so humble opinion) the best for last. It's dessert time people! 

So, when last we left my Thanksgiving adventures, TF was joining my family for Thanksgiving dinner and I was all abuzz (to loosely summarize yesterday's post). After crafting some mad mac and cheese, it was dessert time. This is where my talents have always lied and, despite my improvements in the cooking arena, dessert is still where I shine. As I alluded to yesterday, I was both on a mission to outdo last-year-Gian, as well as impress TF with my rapidly improving culinary skills. And so, I committed with full confidence to make FOUR desserts for this year's feast....only one of which I'd made before. And so the madness began...

Dessert #1: Pumpkin Swirl Cheesecake Redo 


I made this one for the first time the week before Thanksgiving for my awesome day of work-Thanksgiving (also known as the day we got to spend most of the day eating Thanksgiving food outside the office...still one of the best work days ever). I made this one again because it was so delicious and I didn't get nearly enough of it the first time around. Also, I can't have Thanksgiving without something pumpkin-inspired on the table, I'm old school like that.


Dessert #2: Mini Apple Pies


I have a lot of food issues to take into account in my family. My sister and I are vegetarians, my aunt and grandmother can't eat chocolate, and my mom prefers her desserts to only be chocolate. Not sure that my grandmother would receive my pumpkin cheesecake well (she's 87 and pretty set in her ways), I wanted to make an additional chocolate-free item for her to try out. 

Next to pumpkin, apple is my favorite go-to fall baking ingredient. I made my first apple pie last Christmas, but since I was already juggling so many dishes I wanted something slightly easier....enter the mini apple pie. I only have two regrets with this dish--1) that I didn't make the crust from scratch (again, I had to pick my battles...I'm notorious for over-extending myself); and 2) I didn't have a tiny leaf cookie cutter to make the tops prettier. Live and learn. They were still delish...even my chocolate loving mother liked them! 

Ingredients [makes 12]
Original recipe found here
  • 4 cups Granny Smith apples, cut into 1/2 inch pieces
  • 12 Tbsps all-purpose flour
  • 1 1/2 cups of sugar
  • 4 tsps of cinnamon (I let them overflow a little because I LOVE cinnamon)
  • 1/4-1/2 tsp of nutmeg
  • 4 Tbsps chilled butter, cut into 12 equal portions  
  • 1 box (2 crusts) of Pillsbury pie crusts (next time I'm making my own!)
Preparation

1. Unroll your pie crust and begin to cut circles out. Continue this until you have 12 mini crusts. Save the excess dough to make to crust for the tops after the mini pies are filled

Oddly, one of my favorite parts--I used the top of a large glass, but a mason jar lid would work as well

2. Peel and dice apples. Unfortunately, I found this part to be the most tiresome as my mother, the anti-cook likes to keep her kitchen sans fun tools (no apple peeler or slicer for me) and I forgot to bring my own. I rallied though

No matter where I bake, my faithful assistant is always by my side :)

3. Preheat oven to 400 F. Combine apple pieces with cinnamon, flour, and nutmeg in a large bowl. Toss until thoroughly coated


4. Grease and flour muffin tin, then line with mini pie crusts. Nice trick the original creator shared, slightly pinch down the sides so that they stay afloat prior to being filled


5. Fill crusts with apple mixture and gentle push down into pan. Place slice of butter on top of each (I definitely forgot this step and had to yank them out of the oven midway through to add the butter to the top....this was my last dish of the day so my brain was a little fried). Top with excess dough to create a fun crust (this is where I wish I had a leaf cookie cutter)


6. Bake at 400 for 18 to 22 minutes or until crusts begin to brown. Allow to cool slightly before serving. Since we served these the next day, I stored them in the tin overnight, then covered them with foil and warmed for about 10 minutes in the oven to recreate the fresh from the oven taste!

Dessert #3: Chocolate Cake with Chocolate Mousse Frosting and Mini Chocolate Chips


TF is a fairly picky eater as well (although I've made some progress in expanding his food horizons), but luckily he shares my mother's love of chocolate. When we last had Thanksgiving together I insisted that we bring dessert. TF has a couple baking specialties, but chocolate chip cookies are kind of what he's known for (at least in our circle ;)). While our creation used both a boxed cake mix and icing from a can (shake of head, shake of head), we did use homemade cookie dough...although it was not sans egg, so it's somewhat of a miracle no one got sick. Nevertheless, it was delicious and pretty much the biggest cake I've ever made. I would not be doing this story justice without some throwback pics...

TF adding the cookie dough filling on top of layer #1

I forgot about our brilliant idea to add chips to the middle as well....may need to do a remake of this cake in its entirety soon

Behold, the finished masterpiece. We gave away hunks of this cake to our law school classmates and it still took over a week to get rid of it all!

It was from this cake that I drew inspiration for the final two desserts of Thanksgiving 2012:

30 Minute Chocolate Cake Ingredients
Courtesy of a family recipe I discovered 

  • 2 cups all-purpose flour
  • 2 cups granulated sugar
  • 1/2 cup buttermilk
  • 2 eggs
  • 1 tsp baking soda (dissolved in buttermilk)
  • 1 tsp vanilla
  • 2 sticks margarine
  • 3 Tbsps cocoa powder
  • 1 cup water
Chocolate Mousse Icing Ingredients
  • I'll be honest, I kind of made this by accident. I was trying to recreate this one, but it came out super light and fluffy instead. I'll be honest, I'm not sure how I did it (I think my butter was softened too much). So I'll just encourage you to experiment or trust google for this part :)

Preparation

1. Preheat over to 400 F

2. Mix sugar and flour in large bowl


3. Combine margarine, water, and cocoa in a small pot on the stove. Heat to a boil and mix until margarine is dissolved


4. Pour over flour and sugar, mix well


5. Add eggs, buttermilk/baking soda mix, and vanilla. Mix until combined

6. Pour into pan (I used a bundt pan for fun) and bake until cooked through (about 35 minutes)

7. Once cooled, icing and cover with as many mini chips as desired


Dessert #4: Chocolate Chip Cookie Dough Truffle Balls


Since mother doesn't share TF's love of cookie dough, I made these to incorporate the cookie dough element from the original cake into our dessert spread this year. Unlike the original, however, these were from an egg-less recipe, but so good that they were equally as addicting as the real thing.

Ingredients
Courtesy of Cooking Classy 
  • 1/2 cup salted butter, softened
  • 3/4 cup packed light-brown sugar
  • 1/3 cup granulated sugar
  • 1/4 tsp salt
  • 3 Tbsp heavy cream
  • 1 tsp vanilla extract
  • 1 1/2 cups all-purpose flour
  • 1/4 cup milk chocolate chips, chopped (about 1/2 - 1/3 their original size)
  • 1/4 cup semi-sweet chocolate chips, chopped
  • 1/3 cup semi-sweet chocolate chips, for melting/drizzling 
Chopping the chocolate was more fun than I thought it would be....I seriously had so much fun cooking all these desserts, it's kind of ridiculous
Preparation
  1. In the bowl of an electric mixer, whip together butter, brown sugar, granulated sugar and salt until pale and fluffy about 3 - 4 minutes
  2. Stir in cream and vanilla extract. Add in flour and mix just until combine (dough will seem dry at first but it will come together)
  3. Mix in chopped chocolate chips. Scoop dough out 1 equal tablespoon at a time and roll into balls
  4. Place on parchment or wax paper and chill. I chilled mine overnight, but that was due mostly to time
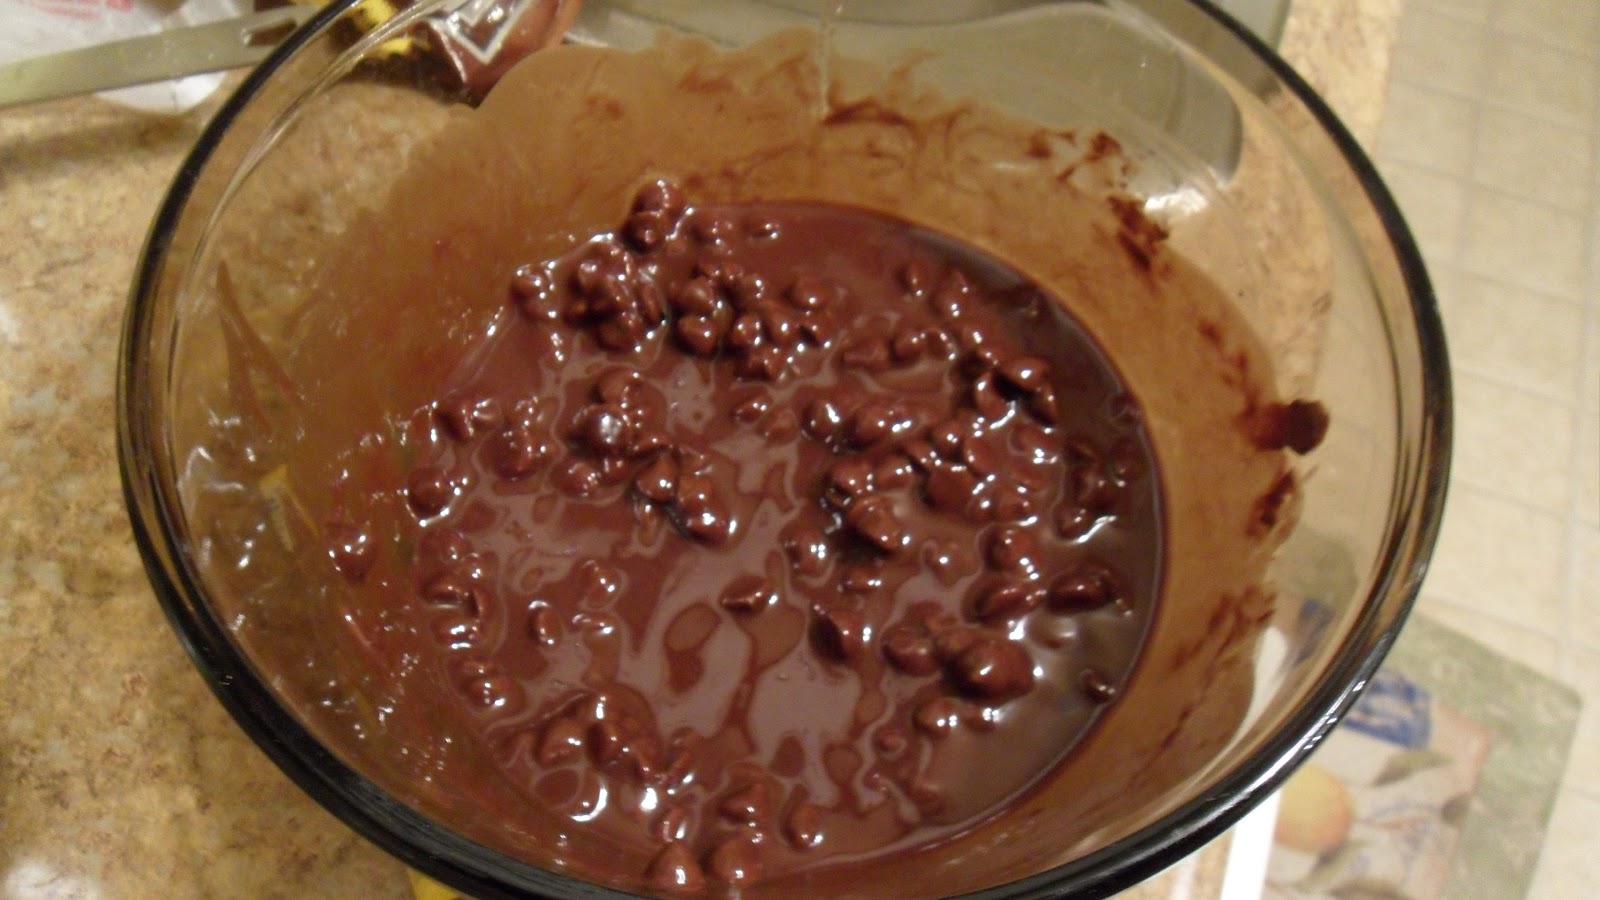
  5. If drizzling with chocolate, place 1/3 cup semi-sweet chocolate chips in a microwave safe container and microwave on 50% power in 30 second intervals, stirring after each interval until melted and smooth
  6. Using a spoon, drizzle chocolate over cookie dough balls (or you can use a ziplock bag with a hole cut in the tip). I knew TF would care more about taste than presentation, so wasn't into dealing with the bag....and I was right
And so concludes Thanksgiving 2012. Congrats if you made it all the way through this epic post, I didn't realize how long it would end up being?! Now, onto many, many days of Christmas baking!!


Monday, November 26, 2012

Thanksgiving Recap: Part 1

It came and it was wonderful. Oh Thanksgiving, I miss you already. Thankfully, I can relive the day in food through a few last posts before diving head first into the Christmas season! 

This year, as my cooking has continued to blossom in recent months, I decided I was ready to take on my largest role yet in the preparation of Thanksgiving dinner. I have spent the better part of the last decade dreaming of the day that I will play host to Thanksgiving dinner. The pieces are slowly starting to come together and I'm loving it. Now that my cooking skills are up to the task, I just need to acquire a home large enough to host the gathering and I'll be good to go. I can barely stand the anticipation. To pacify myself this year, I volunteered to make two sides, as well as my usual slew of desserts. Last year I went a little crazy with the desserts (I think I made three), so I was determined at the least to top 2011-Gian. In addition, TF was going to be joining us for Thanksgiving dinner and I wanted to make sure he was not disappointed. 

Early on in our relationship I learned that TF did not share my love of Thanksgiving (or even enjoy it). While the proclamation nearly killed me, I made it my personal mission to change his feelings towards this glorious day. Unfortunately, I haven't had nearly as many opportunities as I would've liked over the years to sway his opinions. Prior to this year, we'd only spent one other Thanksgiving together (with his family), so this was my first real opportunity to work my magic. When crafting the menu, I decided that I would  make a version of his homemade mac and cheese (I should also mention that he claims to not be a fan of Thanksgiving food in general, so that presents another hurdle that I must overcome) that would serve as his main dish. My dad makes a mean mac and cheese, but since this was going to be 90% of TF's meal, I wanted to make sure he got some veggies as well :) And so, without further ado, I present to you:

TF's Bake Mac and Cheese

Ingredients
Adapted from this 3-cheese version

  • 1 tsp olive oil
  • 1 cup finely chopped onion 
  • 2 Tbsps all-purpose flour 
  • 2 garlic cloves, minced
  • 1 1/2 cups almond milk, plus some additional for baking
  • 2 cups smoked Gouda cheese, shredded
  • 1 1/4 cups 6-cheese Italian shredded cheese blend (Mozzarella, Provolone, Parmesan, Fontina, Romano and Aged Asiago)
  • 3/4 cup 6-cheese Italian shredded cheese blend, save to sprinkle on top before baking
  • 2 cups uncooked whole wheat elbow macaroni
  • 1-2 cups fresh broccoli, uncooked
  • 1 dozen or so small-medium tomatoes (enough to cover the top of the casserole), sliced 
  • 1 cup breadcrumbs (I made my own from whole wheat bread, but store bought work fine as well)
  • Salt and pepper, to taste

Love making homemade bread crumbs

Preparation

1. 
Cook pasta in boiling water for about 5 minutes. Add broccoli and cook for an additional 3 minutes, or until pasta is tender. Drain well


It pretty much took everything in me not to eat all of this....LOVE smoked gouda

2. While pasta is cooking, heat oil in a large saucepan over medium heat. Add onion to pan; cook 8 minutes or until tender, stirring occasionally. Add flour and garlic; cook 1 minute, stirring constantly. Stir in milk and bring to a boil. Cook 2 minutes or until thick, stirring constantly with a whisk. Add cheese, about 1/2 cup at a time, and salt and pepper; stir until cheeses melt


3. Preheat oven to 375° F

4. In a large bowl (or pot) combine pasta with cheese mixture, stirring well. Spread evenly in 13x9 baking dish. Top with tomatoes, lining evenly in rows, then add remaining cheese and bread crumbs. Drizzle milk along the sides of the pan to keep it moist and creamy while baking


5. Bake at 375° for 25 minutes or until heated and bread crumbs have begun to brown. Allow to cool for a minute or two and then dive in

And, as I dreamed, TF loved my creation....as well as my mom's broccoli cheese casserole and he even had turkey?! My plan is beginning to take shape :)

The perks of having a mom that's a teacher--seasonally appropriate stickers. Keeping with his semi-embracing of Thanksgiving, TF adorned one...along with  Sister and our aunt [mom's sister] 

In addition to this killer mac and cheese, I also made a vegetarian stuffing (or dressing if you will). Usually I make my Grandmother's version, but use pho-sausage to replace the actual sausage, but this year I was really into trying an herb version. And so I did, using this sourdough bread stuffing recipe courtesy of the Food Network. I found the finished product to be a little too moist but the flavors were dead on. The fresh herbs really made the recipe!

Toasting sour dough bread for the base

Baked and ready to eat. I can still smell the fresh herbs!


And tomorrow, dessert time!

Sunday, November 25, 2012

Thanksgiving is Coming: Part 3

Even though Thanksgiving has come and gone, I can't fully welcome the Christmas season until I share a few more recipes that I enjoyed during my year of 4 Thanksgivings.

Last Tuesday, before we all headed home for the holidays, some of my friends and I gathered for Friendsgiving. When the idea was originally proposed, I was in love from the start. Gathering with some of my favorite people while dining on my favorite food, what more could I ask for?! Naturally, I eagerly signed up to bring dessert. With a plethora of fall recipes still pinned and waiting for me to try them, I was thrilled to have another opportunity to test dry a new fall dessert. 

Taking a break from my two and a half months of pumpkin baking (and I'm not even close to tired of pumpkin, if you can believe it), I switched to apples for this round. I'll admit, I was frustrated with how long this recipe ended up taking (I made it after work one evening and it ended up requiring way more energy than I was prepared to expend), but after tasting the results, it was well worth the hour and a half I put into it. I'm a believer that apples are a dual fall and winter dessert ingredient and will definitely be on the look out for another opportunity to make this one before spring. 

I can't wait to share all the fun recipes I made for the big day, but in the mean, hope you enjoy this Apple Slab Pie!


Apple Slab Pie


Ingredients
*Adapted from BHG
  • Crust
    • 2 1/4 cups all-purpose flour
    • 3/4 tsp salt
    • 2/3 cup butter-flavored shortening (I used this easy butter substitute)
    • 8 - 10 Tbsp cold water
  • Filling
    • 2/3 cup sugar
    • 1/3 cup all-purpose flour
    • tsp ground cinnamon
    • 3 1/2 pounds tart cooking apples (such as Rome Beauty or Granny Smith), peeled, cored, and cut into 1/4-inch-thick slices (10 cups)
  • Crumb Topping
    • 1 cup brown sugar
    • 1 cup all-purpose flour
    • 1/4 cup butter, diced

Pretty apples, ready to be cut to pieces

Preparation

1. Grease/flour a 13x9-inch baking pan, set aside

2. For dough: In a large bowl, stir together the 2-1/4 cups flour and the salt. Mix in shortening (or butter if using alternate version from above) with flour and salt until mixture resembles coarse crumbs

3. Sprinkle 1 Tbsp of the cold water over part of the flour mixture; gently toss with a fork. Push moistened dough to side of bowl


4. Repeat, using 1 tablespoon cold water at a time, until all of the flour mixture is moistened. Using your fingers, gently knead the dough just until a ball forms


5. Preheat oven to 375 F. On a lightly floured surface, roll dough into a 13x9 inch rectangle. Wrap it around the rolling pin; unroll it into the prepared baking pan


6. Ease dough into the pan and up the sides, being careful not to stretch it. Trim dough to 1/2 inch beyond edge of pan. Fold dough edge over and flute as desired


7. In an extra-large bowl, combine sugar, the 1/3 cup flour, and the cinnamon; add apples. Toss lightly until apples are coated. Spoon apple mixture into dough-lined pan; spread evenly. Sprinkle with Crumb Topping (pan will be full)
Filling mixed and ready to be added to dough

8. Bake for 40 to 45 minutes or until apples are tender. If necessary to prevent over-browning, cover top with foil for the last 5 to 10 minutes of baking. Cool slightly in pan on a wire rack

Pre-bake

9.Serve warm or cool completely (I served it to the gang the next day chilled, but also warmed a leftover piece and it was delicious both ways)
Digging in at Friendsgiving (sorry for the iphone shot). Yum.

Sunday, November 18, 2012

Thanksgiving Dessert Break

Well, we have officially entered the home stretch, Thanksgiving is a mere days away! As you may expect, I'm all abuzz. I went with Mother to the store today to gather the necessary supplies for this year's feast and it only further heightened my excitement. But, before the glorious day of thanks can come, I must get through two more days of work....it's a good thing I like my job. 

Mother also has a shortened week at la escuala, but it's dominated mostly by parent-teacher conferences. Since the teachers have to stay late at school on conference days, they have a potluck dinner for them where they divide course and days among the various grade levels. Mother was tasked with dessert. When she told me this, I was thrilled as that's my dream dish to bring to any occasion (I'm probably stating the obvious here). She, however, was not as jazzed about it. Actually, I think the conversation went something like this:

Mother: (disgruntled tone) I have to find a dessert to bring for conferences next week. 
Me: Oh how exciting! You're so lucky! What are you bringing?!
Mother: I don't know. I hate baking. I'm not a baker. I'll probably buy something, but I don't know what.

Well, I simply couldn't let that happen. Thus, I told her I'd throw something easy together for her to take in and she could even claim it as her own. Since her only lift in this scenario was buying the ingredients (most of which she already had on hand), she was game. And, since I already had a recipe in mind, it was a fairly lift for me as well. 

I made this recipe a few weeks ago, for my parents actually, and not only did they love it (and my dad isn't even a chocolate fan), but it's super easy and requires minimal dishes and prep time (perfect for Thanksgiving when there never seems to be enough time and the piles of dirty dishes are never-ending). If you're looking for a non-pumpkin dessert to add to the Thanksgiving table, I highly recommend this gem.

One-Bowl Chocolate Chunk Brownies
Adapted from Picky Palate

Sorry I couldn't cut into these for a better shot...but check out those beautiful chocolate chunks! 

Ingredients
  • 1 stick unsalted butter, melted
  • 1 1/2 cups semi-sweet chocolate chips
  • 1 cup all-purpose Gold Medal Flour
  • 1/4 teaspoon salt
  • 1/2 cup granulated sugar
  • 1/2 cup packed light brown sugar
  • 2 large eggs + 1 egg yolk
  • 2 tablespoons vegetable oil
  • 2 cups chocolate chunks
Preparation

1. Preheat oven to 350 degrees F and grease a 13x9 pan
2. Place butter into a large mixing bowl and microwave until melted and hot, about 45 seconds to 1 minute. Pour in chocolate chips and stir until mostly melted

I'll be honest, I hate this part. I've made this recipe twice and my arm never ceases to feel like it's going to fall off...but silver-lining, a little arm workout while baking?!?

    3. Add flour, salt and sugars. Mix a few times then add eggs, yolk, and oil. Mix until well combined 


    4. Finally, add chocolate chunks and stir until evenly blended into the batter


    5. Transfer batter to prepared baking dish, spreading evenly. Bake for 35-40 minutes, until cooked through

    *I will caution that these brownies are fairly rich, so a small piece goes a long way :)

    4 DAYS TIL THANKSGIVING!! 

    Thursday, November 15, 2012

    Thanksgiving is Coming: Part 2

    I don't know what's more disconcerting, the fact that I managed to ruin cookies last night (still a mystery as to how, but I'll get to that later) or that I have no idea what the second part to my Monday post was supposed to be. I usually just go through my camera or recent photo uploads, but this time my methods failed me. So, here we are. As it is, my earlier failings of the night are still my primary focus. I can't believe how bad I failed at cookie making! As much as my, at times over-inflated, ego likes to think otherwise, I am by no means a perfect baker/cook. I've been baking (or attempting to bake) for the better part of the last 12 years. Looking back, I  have definitely come a long way, especially within the last year, which is why last night's episode was all the more alarming. 

    Although my beloved Thanksgiving is still a week away, my first of several Thanksgiving celebrations begins today. You'll recall from my birthday festivities back in March that the only thing I love more than a holiday is stretching out the celebration of said holiday. Despite my love for Thanksgiving, I haven't gotten to celebrate it for more than a day since elementary school when we'd make "Indian"vests out of brown grocery sacks and have a pho-Thanksgiving dinner (the only item of which I actually remember the meal entailing was cornbread). So, you can imagine my elation when I discovered that I would have no less than four Thanksgiving celebrations this year [insert me screaming and jumping up and down here]. It's already getting hard for me to sleep as the excitement and anticipation over the events of the next week continues to build.  

    Today's celebration is a work retreat turned Thanksgiving potluck. Not only is this little soiree during the work day, but it's being hosted at a co-worker's abode who lives around 5 minutes from me. Finally living in the District has its perks! In preparation for this glorious occasion, I eagerly signed up to bring one of several pumpkin recipes still awaiting my attention: pumpkin swirl cheesecake. I made my first cheesecake for Thanksgiving last year and since acquiring a cheesecake pan to call my own, I've only used it to make this veggie lasagna. Shame. The lasagna was delicious, but my spring form pan was born to make cheesecakes! The only thing I hate about making cakes and the like is that there are no samples for the baker (this would be the main reason I could not be a baker in real life...I would eat half of everything I make). To remedy this, I decided I would make use of all the pumpkin spice Hershey kisses I have lying around and whip up some fun pumpkin spice cookies as well. The intention was to have one while baking and take the rest to our pho-Thanksgiving this afternoon as a little aside to my main dessert dish. Oh the best laid plans...


    Pumpkin spice kisses waiting to be put to use

    I mixed up the dough according to the recipe, even sampling some along the way. It was the perfect fusion of pumpkin spices and sugar, and things seemed promising (despite the fact that I never get nearly as many cookies out of a recipe as promised). 


    And then, about 7 minutes into baking, I looked in the oven and things had gone horribly a-rye. I tried to cook them through their time, but as you can see, the mass began running off the sides and dripping down into the oven, creating a heinous burning smell on top of everything else. In the end, I had to dispose of the giant mussy cookie mass and clean the oven before I could bake my cheesecake. I was not only unhappy, but also riddled with fear that I would mess up my cheesecake as well! 


    With a deep breath, I began baking project number two of the night. As with most of my fall baking recipes, I found this gem on pinterest and was instantly in love with the idea of pumpkin infused cheesecake. I made a pumpkin cheesecake last Thanksgiving, but I felt like the fun swirl in this one gave it a little extra pizzazz for the big day. Since I hate transporting things with icing on them, but still wanted to do something impressive for our works-giving, this recipe won out. Unlike the cookies, it emerged from the oven in its correct state and I can only hope that it tastes as good as it looks!


    Pumpkin Swirl Cheesecake


    Ingredients
    Adapted from this version

    Crust

    • 2 cups gramham cracker crumble
    • 1/2 cup melted butter
    • 2 Tbsp sugar
    Filling
    • 3/4 cup white sugar
    • 1/4 cup brown sugar
    • 3 Tbsps unbleached all-purpose flour
    • 1 (8 oz) package cream cheese, softened
    • 1 (3 oz) package cream cheese, softened
    • 1 Tbsp vanilla extract
    • 1 1/2 tsp pumpkin spice (cinnamon, nutmeg, ginger)
    • 3 eggs
    • 2 cups pumpkin puree (canned or make your own like I did)
    • 1 Tbsp milk
    Preparation

    1. Combine crust ingredients into a large bowl and mix until well coated with the melted butter

    2. In a 9 inch spring form pan, spread the crust mix and pack evenly along the bottom and about 2/3 of the way up the sides. Place crust in freezer to chill while mixing filling


    My sweet Shepherd dog came to offer moral support for my second attempt at baking this evening. She usually serves as my baking assistant, but was asleep on the couch during the cookie massacre so we couldn't risk the cheesecake meeting the same fate

    3. Preheat oven to 375 degrees F

    4. In a large bowl, combine white sugar, brown sugar, flour, and cream cheese. Beat on low speed until smooth. Reserve 1/2 cup of this mixture to swirl in later

    5. To the mixture in the bowl, add vanilla and pumpkin spice. Blend in eggs and pumpkin puree. Scrape bowl, and beat until smooth. Pour into crust.

    6. Stir milk into the reserved cream cheese mixture. Drop by spoonfuls over the pumpkin mixture. Use a knife to decoratively swirl the two mixtures together [I didn't find the swirls to show much as much as I would've liked, but that could be due to my own baking issues last night]

    Ready to bake. Deep breath...

    Alas, victory was mine. I'm back! Now to hope that it tastes as good as it looks!


    *Update: My pumpkin swirl cheesecake was a huge it at our office retreat/Thanksgiving celebration today. I'm not sure what I was happier about, getting to spend a day out of the office and dining on Thanksgiving food, or the fact that baking praise was bestowed upon me for my work. I can only hope the rest of my Thanksgiving creations go this well!

    Monday, November 12, 2012

    Thanksgiving is Coming: Part 1

    There's nothing I love more than a good 3-day weekend and this one came not a moment too soon. My sleep schedule was in shambles after election night and plummeted even further with some late nights at the beginning of the weekend. Thus, you can imagine the joy I felt when on Sunday I still had another day of weekend to catch up on sleep with (gotta love all the federal holidays this time of year). In an effort to not squander the entire day sleeping (or miss out on the gorgeous weather), I spent some time today walking with Bax and enjoying the leaves in the park and looking up some recipes for Thanksgiving dinner.

    I will never get over how gorgeous the leaves are in fall

    I love Thanksgiving so very much (I actually claim it as my favorite holiday) and it's been a dream of mine for as long as I can remember to one day (when I live in something bigger than my current studio apartment) host the event. Since my time as a host is still a ways off, I have settled for the next best thing: coordinating the menu. Last year this time I was just starting to focus on developing my culinary skills and undertook the task of creating a slew of desserts. They were all amazingly delicious and if I didn't love Thanksgiving food so much, I would've feasted on them as my meal. This year, I have no choice but to try and top last year's efforts (damn my competitive nature). In the meantime, I'm guessing I'm not the only one who's thinking about recipes for the big day and thus I wanted to share two delectable fall-inspired sides that I made recently that could also serve as a great addition to any Thanksgiving table.

    Acorn Squash with Wild Rice and Veggies


    This is one of those recipes that is great when you need to use up some extra vegetables before they go bad and can easily be tweaked depending on the season or taste preferences. I ate it as a meal, but the recipe could definitely be increased (based on crowd size) and used as a Thanksgiving side as well. 

    Ingredients

    • 1 package of long grain wild rice 
    • 1 acorn squash, roasted
    • 1/2 cup carrots, sliced
    • 1/2 cup portobello mushroom slices
    • 1-1 1/2 cups baby spinach
    • 4-5 capellini tomatoes, diced
    • 1 Tbsp olive oil
    • salt and pepper, to taste
    Preparation
    1. Roast acorn squash either in the oven or crockpot. I used my pumpkin roasting crockpot method that I recently discovered and am currently obsessed with
    2. Prepare rice according to package (usually takes about 25 minutes). With about five minutes left, I added my carrots to cook with the rice (but they could also be cooked in the skillet/wok as well)
    3. Meanwhile, remove acorn squash from skin and discard skin (my only regret on this recipe is letting the squash cook for too long so that it was mushy rather than diceable...this is my punishment for not having a vision for the meal when I started cooking the squash)
    4. Heat olive oil in wok or skillet, then add mushroom slices. Cook for 2-3 minutes, then add in tomatoes and squash and continue to cook for an additional 4-5 minutes
    5. Add in spinach and cook for 2-3 minutes. Cover and remove from heat to allow spinach to wilt
    6. Once rice is cooked, mix with veggie mix in skillet, season and serve
    Veggies post cooking (I also had to drain the excess water as a result of the squash not being as firm as it should've been...still good though)

    Wild rice and carrots ready to eat

    Giada's Roasted Veggies

    Another great veggie side for the big day comes courtesy of my beloved Food Network. I had dinner with my parents over the weekend and offered to make these to accompany the fish my dad was preparing. They were a huge hit and would be a great easy, low stress addition to Thanksgiving dinner.


    Ingredients
    Courtesy of Giadá
    • 1/3 cup extra-virgin olive oil
    • 3 medium carrots (about 3/4 pound), cut into 1 1/2-inch thick circles
    • 1 1/2 cups Brussels sprouts (about 1/2 pound), halved
    • 4 cups red bliss potatoes (about 1 pound), cut into 1 1/2-inch thick slices
    • 3 medium parsnips (about 1 pound), cut into 1 1/2-inch thick slices
    • 1 cup sweet potatoes (about 1 pound), cut into 1 1/2-inch thick slices
    • 1 tablespoon dried oregano
    • 1 tablespoon dried rosemary
    • 1 teaspoon dried thyme
    • 1 teaspoon dried basil
    • 1/4 teaspoon sea salt
    • 2 tablespoons freshly ground black pepper

    Preparation
    1. Preheat oven to 400 degrees F.
    2. Wash and cut vegetables as mentioned above
    3. Grease an 11 by 17-inch baking sheet pan with extra-virgin olive oil. Place vegetables in baking sheet and add the dried herbs, salt and pepper. Toss well, evenly coating all the vegetables with the seasonings and oil. Add more oil if the vegetables seem dry
    4. Spread the vegetables evenly on a large baking sheet. Place on middle rack in oven and bake for 35 to 40 minutes. Enjoy!