When I started to think about the order in which I wanted to share
my recipes from last weekend, I fully intended to share this one last, as a grand
finale of sorts. Unfortunately, when I was pulling pictures for yesterday’s post, my excitement got the better of me and I decided I had to share this creation
sooner rather than later!
Up until this point, nothing that I’ve cooked up has elicited the level
of pride in me that this cake did. I attribute that to two things: challenge
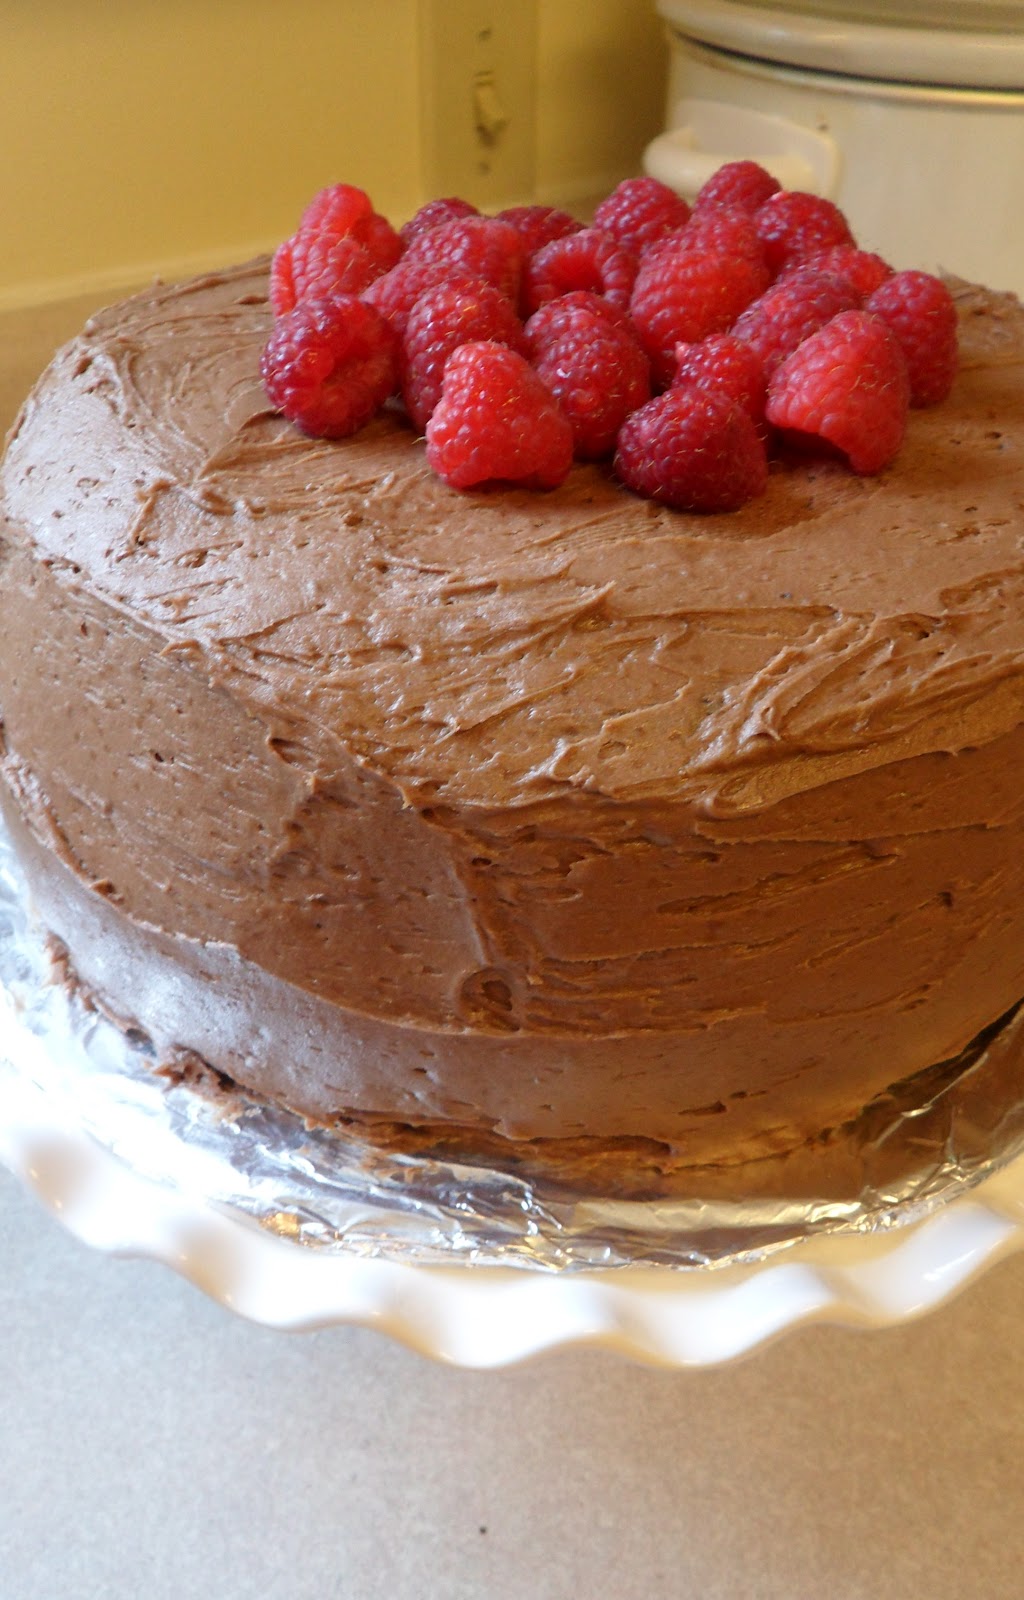
level and the addition of a new cooking accessory, my first cake stand. Obtaining a cake stand hasn't been a long standing dream of mine (I don't really make that many cakes, let alone have cause to display them proudly), but after obtaining Mr. Red, it seemed like the next logical step. So, when mother and I were out running errands on Saturday (as per our custom when I'm in town) a cake stand caught my eye. It was plain and simple and not what I envisioned my first cake stand looking like, but it ignited in me a desire to finally obtain one. Despite the fact that we were relatively pressed for time and I continued to take on various pre-Easter projects, Mother encouraged my quest with trepedation. I talked her into stopping at Bed Bath and Beyond and Michael's, but both failed me. Not really having the energy to pursue the search beyond what was convenient, I resigned myself to internet shopping upon returning to the District. And then Pier 1 appeared.
I've loved that store since I was little and we'd go there to buy replacement cushions for our papashian chair (who's name I was certain my parents had made up). Mother and I love that store and it's one of those places we could easily spend an hour or more wandering around. Since we were on somewhat of a time crunch, we had to hurry a little, but not so much that an ounce of the store was left uncovered :) About midway through, I found it....a cake stand worthy of the title of first cake stand! Joy filled me as I proudly marched it to the counter for purchasing (I'm fairly certain the sales lady thought I was crazy...or on some sort of drug-induced high). With the purchase of my cake stand, I knew this cake had to be epic. And it was, earning it the title of "first adult cake."
As part of my Thanksgiving dessert ensemble (it's my favorite holiday and I went big last year, making three delicious treats), Alicia was kind enough to pass along the best chocolate cake recipe ever from her sister. It was actually the first chocolate cake I ever made from scratch and it pretty much sold me on never making a boxed cake again! Not wanting to make the entirely same cake again, I decided I'd use it as the base and add a chocolate mouse filling, chocolate ganache topping and fresh raspberries (as seen on one of my favorite blogs).
Well, chocolate mouse was a fail. It was my first pass at it and it ended with a bowl of chocolate goo. I was disappointed but not heartbroken (I don't actually care for mouse). I blame it on the fact that Mr. Red didn't make the trip to Bmore with me and thus I didn't have my trusty whisk attachment. I will conquer mouse eventually, but that's for another post. This time, I improvised, and the result was deathly delicious!

Alicia's Chocolate Cake
Ingredients

Chocolate Ganache
[original found here...along with my inspiration for this cake]
Ingredients


I've loved that store since I was little and we'd go there to buy replacement cushions for our papashian chair (who's name I was certain my parents had made up). Mother and I love that store and it's one of those places we could easily spend an hour or more wandering around. Since we were on somewhat of a time crunch, we had to hurry a little, but not so much that an ounce of the store was left uncovered :) About midway through, I found it....a cake stand worthy of the title of first cake stand! Joy filled me as I proudly marched it to the counter for purchasing (I'm fairly certain the sales lady thought I was crazy...or on some sort of drug-induced high). With the purchase of my cake stand, I knew this cake had to be epic. And it was, earning it the title of "first adult cake."
As part of my Thanksgiving dessert ensemble (it's my favorite holiday and I went big last year, making three delicious treats), Alicia was kind enough to pass along the best chocolate cake recipe ever from her sister. It was actually the first chocolate cake I ever made from scratch and it pretty much sold me on never making a boxed cake again! Not wanting to make the entirely same cake again, I decided I'd use it as the base and add a chocolate mouse filling, chocolate ganache topping and fresh raspberries (as seen on one of my favorite blogs).
Well, chocolate mouse was a fail. It was my first pass at it and it ended with a bowl of chocolate goo. I was disappointed but not heartbroken (I don't actually care for mouse). I blame it on the fact that Mr. Red didn't make the trip to Bmore with me and thus I didn't have my trusty whisk attachment. I will conquer mouse eventually, but that's for another post. This time, I improvised, and the result was deathly delicious!

Alicia's Chocolate Cake
Ingredients
- 2 cups sugar
- 1 3/4 cups all purpose flour
- 3/4 cup cocoa powder
- 1 1/2 tsp baking powder
- 1 1/2 tsp baking soda
- 1 tsp salt
- 2 eggs
- 1 cup milk
- 1/2 cup vegetable oil
- 2 tsp vanilla
- 1 cup boiling water
Preparation
- Preheat oven to 350F and grease/flour desired pan size (recipe makes 2 9 inch rounds)
- Combine dry ingredients in large bowl
- Add milk, eggs, oil, and vanilla, beat on medium speed for 2 minutes
- Stir in boiling water (batter will become thin)
- Distribute batter evenly among pans. Bake for 30-35 minutes

[original found here...along with my inspiration for this cake]
Ingredients
- 1/2 cup + 1 Tbsp sugar
- 1/2 cup unsweetened cocoa powder
- 1/2 cup heavy whipping cream
- 1/2 tsp vanilla
- 3 ounces finely chopped chocolate
Preparation
- In a small heavy saucepan, combine sugar and cocoa powder
- Gradually add just enough milk to make a paste, then stir in the rest
- Cook over medium heat, stirring constantly with a spatula (make sure you’re getting the corners of the pan) until mixture comes to a boil. Boil gently, and stir for about 2 minutes
- Remove from heat and add vanilla
- Let cool for 5 minutes. Stir in chocolate until melted and smooth
- Cover the surface of the frosting with wax paper and let cool until spreadable
Since my attempt at the mouse filing was a fail, I ended up using the ganache as my filling. It's very rich, so it worked perfectly in small doses. To offset the richness of the ganache, I used a light chocolate buttercream frosting to top things off. Worked like a charm.

Chocolate Buttercream Frosting
[Original found here]
Ingredients
- 1 cup unsalted butter (2 sticks or 1/2 pound), softened (but not melted!)
- 3 1/2 cups confectioners (powdered) sugar
- 1/2 cup cocoa powder
- 1/2 teaspoon table salt
- 2 teaspoons vanilla extract or 1 teaspoon almond extract
- 4 tablespoons milk or heavy cream
- Fresh raspberries for topping
Preparation
- Cream butter for a few minutes in a mixer with the paddle attachment on medium speed
- Sift 3 cups powdered sugar and cocoa into the mixing bowl. Turn your mixer on the lowest speed (so the dry ingredients do not blow everywhere) until the sugar and cocoa are absorbed by the butter
- Increase mixer speed to medium and add vanilla extract, salt, and milk/cream and beat for 3 minutes
- If your frosting needs a more stiff consistency, add a little more sugar. If your frosting needs to be thinned out, add additional milk 1 tablespoon at a time

Sweet.
Chocolate.

Love.
No comments:
Post a Comment