Pages

Showing posts with label cheesecake. Show all posts

Tuesday, November 27, 2012

Thanksgiving Recap: Part 2

Ok, I promise, this is my last Thanksgiving-related post. As much as it pains me to admit, fall has come and gone for another year. The ground was littered with leaves during my morning commute today and, despite the fact that I was listening to Christmas music, I cried a little on the inside. But, I have saved (in my not so humble opinion) the best for last. It's dessert time people! 

So, when last we left my Thanksgiving adventures, TF was joining my family for Thanksgiving dinner and I was all abuzz (to loosely summarize yesterday's post). After crafting some mad mac and cheese, it was dessert time. This is where my talents have always lied and, despite my improvements in the cooking arena, dessert is still where I shine. As I alluded to yesterday, I was both on a mission to outdo last-year-Gian, as well as impress TF with my rapidly improving culinary skills. And so, I committed with full confidence to make FOUR desserts for this year's feast....only one of which I'd made before. And so the madness began...

Dessert #1: Pumpkin Swirl Cheesecake Redo 


I made this one for the first time the week before Thanksgiving for my awesome day of work-Thanksgiving (also known as the day we got to spend most of the day eating Thanksgiving food outside the office...still one of the best work days ever). I made this one again because it was so delicious and I didn't get nearly enough of it the first time around. Also, I can't have Thanksgiving without something pumpkin-inspired on the table, I'm old school like that.


Dessert #2: Mini Apple Pies


I have a lot of food issues to take into account in my family. My sister and I are vegetarians, my aunt and grandmother can't eat chocolate, and my mom prefers her desserts to only be chocolate. Not sure that my grandmother would receive my pumpkin cheesecake well (she's 87 and pretty set in her ways), I wanted to make an additional chocolate-free item for her to try out. 

Next to pumpkin, apple is my favorite go-to fall baking ingredient. I made my first apple pie last Christmas, but since I was already juggling so many dishes I wanted something slightly easier....enter the mini apple pie. I only have two regrets with this dish--1) that I didn't make the crust from scratch (again, I had to pick my battles...I'm notorious for over-extending myself); and 2) I didn't have a tiny leaf cookie cutter to make the tops prettier. Live and learn. They were still delish...even my chocolate loving mother liked them! 

Ingredients [makes 12]
Original recipe found here
  • 4 cups Granny Smith apples, cut into 1/2 inch pieces
  • 12 Tbsps all-purpose flour
  • 1 1/2 cups of sugar
  • 4 tsps of cinnamon (I let them overflow a little because I LOVE cinnamon)
  • 1/4-1/2 tsp of nutmeg
  • 4 Tbsps chilled butter, cut into 12 equal portions  
  • 1 box (2 crusts) of Pillsbury pie crusts (next time I'm making my own!)
Preparation

1. Unroll your pie crust and begin to cut circles out. Continue this until you have 12 mini crusts. Save the excess dough to make to crust for the tops after the mini pies are filled

Oddly, one of my favorite parts--I used the top of a large glass, but a mason jar lid would work as well

2. Peel and dice apples. Unfortunately, I found this part to be the most tiresome as my mother, the anti-cook likes to keep her kitchen sans fun tools (no apple peeler or slicer for me) and I forgot to bring my own. I rallied though

No matter where I bake, my faithful assistant is always by my side :)

3. Preheat oven to 400 F. Combine apple pieces with cinnamon, flour, and nutmeg in a large bowl. Toss until thoroughly coated


4. Grease and flour muffin tin, then line with mini pie crusts. Nice trick the original creator shared, slightly pinch down the sides so that they stay afloat prior to being filled


5. Fill crusts with apple mixture and gentle push down into pan. Place slice of butter on top of each (I definitely forgot this step and had to yank them out of the oven midway through to add the butter to the top....this was my last dish of the day so my brain was a little fried). Top with excess dough to create a fun crust (this is where I wish I had a leaf cookie cutter)


6. Bake at 400 for 18 to 22 minutes or until crusts begin to brown. Allow to cool slightly before serving. Since we served these the next day, I stored them in the tin overnight, then covered them with foil and warmed for about 10 minutes in the oven to recreate the fresh from the oven taste!

Dessert #3: Chocolate Cake with Chocolate Mousse Frosting and Mini Chocolate Chips


TF is a fairly picky eater as well (although I've made some progress in expanding his food horizons), but luckily he shares my mother's love of chocolate. When we last had Thanksgiving together I insisted that we bring dessert. TF has a couple baking specialties, but chocolate chip cookies are kind of what he's known for (at least in our circle ;)). While our creation used both a boxed cake mix and icing from a can (shake of head, shake of head), we did use homemade cookie dough...although it was not sans egg, so it's somewhat of a miracle no one got sick. Nevertheless, it was delicious and pretty much the biggest cake I've ever made. I would not be doing this story justice without some throwback pics...

TF adding the cookie dough filling on top of layer #1

I forgot about our brilliant idea to add chips to the middle as well....may need to do a remake of this cake in its entirety soon

Behold, the finished masterpiece. We gave away hunks of this cake to our law school classmates and it still took over a week to get rid of it all!

It was from this cake that I drew inspiration for the final two desserts of Thanksgiving 2012:

30 Minute Chocolate Cake Ingredients
Courtesy of a family recipe I discovered 

  • 2 cups all-purpose flour
  • 2 cups granulated sugar
  • 1/2 cup buttermilk
  • 2 eggs
  • 1 tsp baking soda (dissolved in buttermilk)
  • 1 tsp vanilla
  • 2 sticks margarine
  • 3 Tbsps cocoa powder
  • 1 cup water
Chocolate Mousse Icing Ingredients
  • I'll be honest, I kind of made this by accident. I was trying to recreate this one, but it came out super light and fluffy instead. I'll be honest, I'm not sure how I did it (I think my butter was softened too much). So I'll just encourage you to experiment or trust google for this part :)

Preparation

1. Preheat over to 400 F

2. Mix sugar and flour in large bowl


3. Combine margarine, water, and cocoa in a small pot on the stove. Heat to a boil and mix until margarine is dissolved


4. Pour over flour and sugar, mix well


5. Add eggs, buttermilk/baking soda mix, and vanilla. Mix until combined

6. Pour into pan (I used a bundt pan for fun) and bake until cooked through (about 35 minutes)

7. Once cooled, icing and cover with as many mini chips as desired


Dessert #4: Chocolate Chip Cookie Dough Truffle Balls


Since mother doesn't share TF's love of cookie dough, I made these to incorporate the cookie dough element from the original cake into our dessert spread this year. Unlike the original, however, these were from an egg-less recipe, but so good that they were equally as addicting as the real thing.

Ingredients
Courtesy of Cooking Classy 
  • 1/2 cup salted butter, softened
  • 3/4 cup packed light-brown sugar
  • 1/3 cup granulated sugar
  • 1/4 tsp salt
  • 3 Tbsp heavy cream
  • 1 tsp vanilla extract
  • 1 1/2 cups all-purpose flour
  • 1/4 cup milk chocolate chips, chopped (about 1/2 - 1/3 their original size)
  • 1/4 cup semi-sweet chocolate chips, chopped
  • 1/3 cup semi-sweet chocolate chips, for melting/drizzling 
Chopping the chocolate was more fun than I thought it would be....I seriously had so much fun cooking all these desserts, it's kind of ridiculous
Preparation
  1. In the bowl of an electric mixer, whip together butter, brown sugar, granulated sugar and salt until pale and fluffy about 3 - 4 minutes
  2. Stir in cream and vanilla extract. Add in flour and mix just until combine (dough will seem dry at first but it will come together)
  3. Mix in chopped chocolate chips. Scoop dough out 1 equal tablespoon at a time and roll into balls
  4. Place on parchment or wax paper and chill. I chilled mine overnight, but that was due mostly to time
  5. If drizzling with chocolate, place 1/3 cup semi-sweet chocolate chips in a microwave safe container and microwave on 50% power in 30 second intervals, stirring after each interval until melted and smooth
  6. Using a spoon, drizzle chocolate over cookie dough balls (or you can use a ziplock bag with a hole cut in the tip). I knew TF would care more about taste than presentation, so wasn't into dealing with the bag....and I was right
And so concludes Thanksgiving 2012. Congrats if you made it all the way through this epic post, I didn't realize how long it would end up being?! Now, onto many, many days of Christmas baking!!




Thursday, November 15, 2012

Thanksgiving is Coming: Part 2

I don't know what's more disconcerting, the fact that I managed to ruin cookies last night (still a mystery as to how, but I'll get to that later) or that I have no idea what the second part to my Monday post was supposed to be. I usually just go through my camera or recent photo uploads, but this time my methods failed me. So, here we are. As it is, my earlier failings of the night are still my primary focus. I can't believe how bad I failed at cookie making! As much as my, at times over-inflated, ego likes to think otherwise, I am by no means a perfect baker/cook. I've been baking (or attempting to bake) for the better part of the last 12 years. Looking back, I  have definitely come a long way, especially within the last year, which is why last night's episode was all the more alarming. 

Although my beloved Thanksgiving is still a week away, my first of several Thanksgiving celebrations begins today. You'll recall from my birthday festivities back in March that the only thing I love more than a holiday is stretching out the celebration of said holiday. Despite my love for Thanksgiving, I haven't gotten to celebrate it for more than a day since elementary school when we'd make "Indian"vests out of brown grocery sacks and have a pho-Thanksgiving dinner (the only item of which I actually remember the meal entailing was cornbread). So, you can imagine my elation when I discovered that I would have no less than four Thanksgiving celebrations this year [insert me screaming and jumping up and down here]. It's already getting hard for me to sleep as the excitement and anticipation over the events of the next week continues to build.  

Today's celebration is a work retreat turned Thanksgiving potluck. Not only is this little soiree during the work day, but it's being hosted at a co-worker's abode who lives around 5 minutes from me. Finally living in the District has its perks! In preparation for this glorious occasion, I eagerly signed up to bring one of several pumpkin recipes still awaiting my attention: pumpkin swirl cheesecake. I made my first cheesecake for Thanksgiving last year and since acquiring a cheesecake pan to call my own, I've only used it to make this veggie lasagna. Shame. The lasagna was delicious, but my spring form pan was born to make cheesecakes! The only thing I hate about making cakes and the like is that there are no samples for the baker (this would be the main reason I could not be a baker in real life...I would eat half of everything I make). To remedy this, I decided I would make use of all the pumpkin spice Hershey kisses I have lying around and whip up some fun pumpkin spice cookies as well. The intention was to have one while baking and take the rest to our pho-Thanksgiving this afternoon as a little aside to my main dessert dish. Oh the best laid plans...


Pumpkin spice kisses waiting to be put to use

I mixed up the dough according to the recipe, even sampling some along the way. It was the perfect fusion of pumpkin spices and sugar, and things seemed promising (despite the fact that I never get nearly as many cookies out of a recipe as promised). 


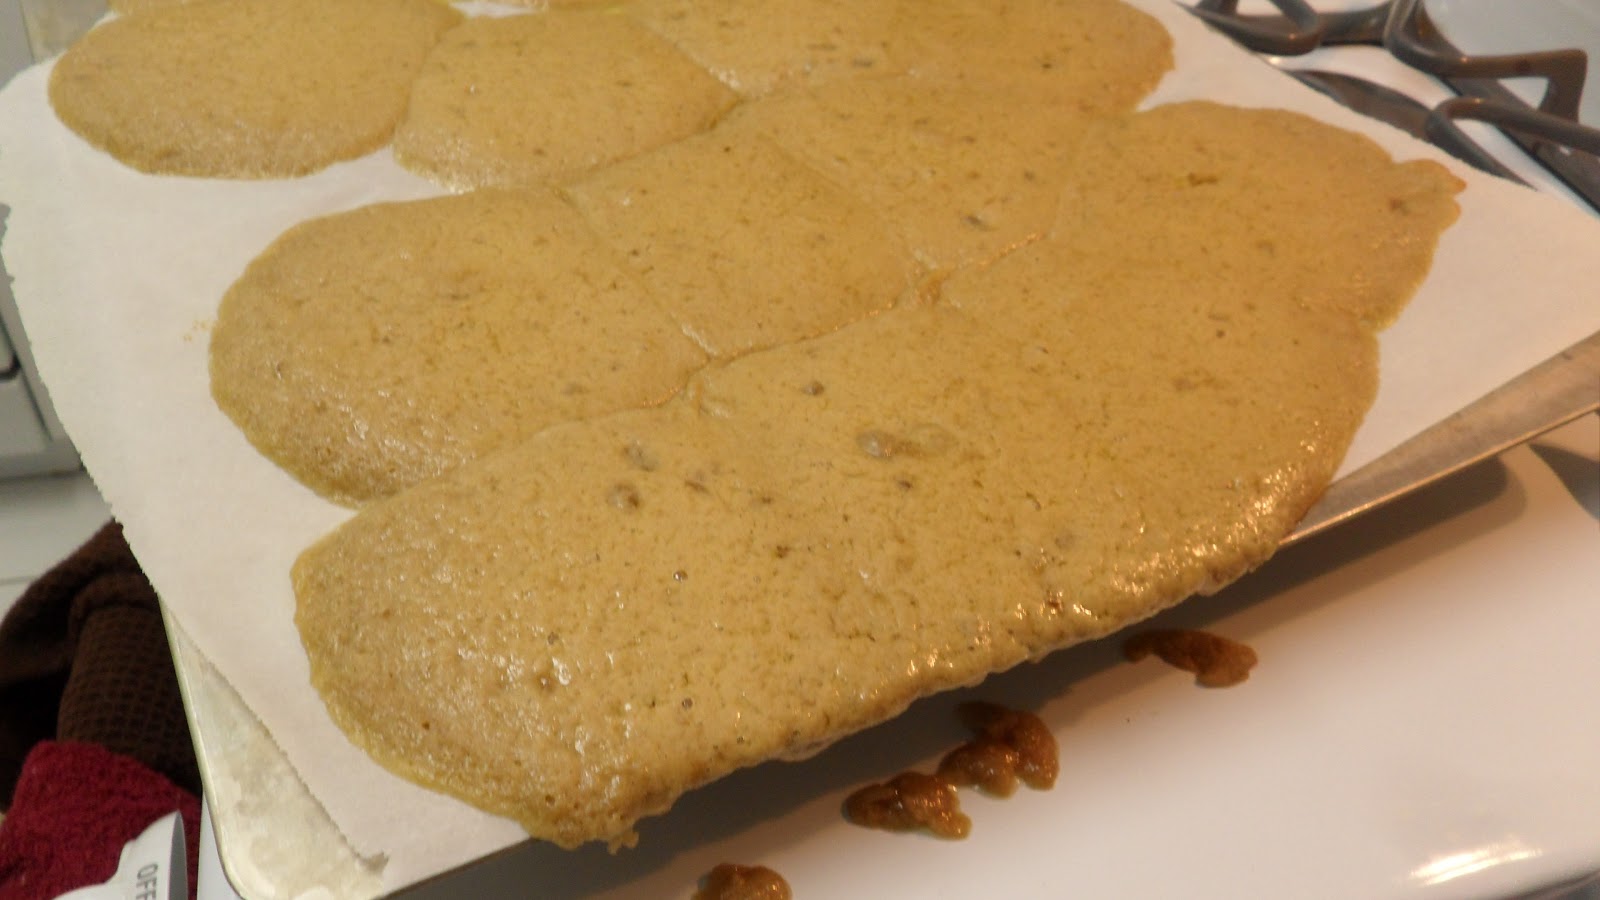
And then, about 7 minutes into baking, I looked in the oven and things had gone horribly a-rye. I tried to cook them through their time, but as you can see, the mass began running off the sides and dripping down into the oven, creating a heinous burning smell on top of everything else. In the end, I had to dispose of the giant mussy cookie mass and clean the oven before I could bake my cheesecake. I was not only unhappy, but also riddled with fear that I would mess up my cheesecake as well! 


With a deep breath, I began baking project number two of the night. As with most of my fall baking recipes, I found this gem on pinterest and was instantly in love with the idea of pumpkin infused cheesecake. I made a pumpkin cheesecake last Thanksgiving, but I felt like the fun swirl in this one gave it a little extra pizzazz for the big day. Since I hate transporting things with icing on them, but still wanted to do something impressive for our works-giving, this recipe won out. Unlike the cookies, it emerged from the oven in its correct state and I can only hope that it tastes as good as it looks!


Pumpkin Swirl Cheesecake


Ingredients
Adapted from this version

Crust

  • 2 cups gramham cracker crumble
  • 1/2 cup melted butter
  • 2 Tbsp sugar
Filling
  • 3/4 cup white sugar
  • 1/4 cup brown sugar
  • 3 Tbsps unbleached all-purpose flour
  • 1 (8 oz) package cream cheese, softened
  • 1 (3 oz) package cream cheese, softened
  • 1 Tbsp vanilla extract
  • 1 1/2 tsp pumpkin spice (cinnamon, nutmeg, ginger)
  • 3 eggs
  • 2 cups pumpkin puree (canned or make your own like I did)
  • 1 Tbsp milk
Preparation

1. Combine crust ingredients into a large bowl and mix until well coated with the melted butter

2. In a 9 inch spring form pan, spread the crust mix and pack evenly along the bottom and about 2/3 of the way up the sides. Place crust in freezer to chill while mixing filling


My sweet Shepherd dog came to offer moral support for my second attempt at baking this evening. She usually serves as my baking assistant, but was asleep on the couch during the cookie massacre so we couldn't risk the cheesecake meeting the same fate

3. Preheat oven to 375 degrees F

4. In a large bowl, combine white sugar, brown sugar, flour, and cream cheese. Beat on low speed until smooth. Reserve 1/2 cup of this mixture to swirl in later

5. To the mixture in the bowl, add vanilla and pumpkin spice. Blend in eggs and pumpkin puree. Scrape bowl, and beat until smooth. Pour into crust.

6. Stir milk into the reserved cream cheese mixture. Drop by spoonfuls over the pumpkin mixture. Use a knife to decoratively swirl the two mixtures together [I didn't find the swirls to show much as much as I would've liked, but that could be due to my own baking issues last night]

Ready to bake. Deep breath...

Alas, victory was mine. I'm back! Now to hope that it tastes as good as it looks!


*Update: My pumpkin swirl cheesecake was a huge it at our office retreat/Thanksgiving celebration today. I'm not sure what I was happier about, getting to spend a day out of the office and dining on Thanksgiving food, or the fact that baking praise was bestowed upon me for my work. I can only hope the rest of my Thanksgiving creations go this well!

Monday, May 21, 2012

Mother's Day Treats

Mother's Day really took me by surprise this year, almost road runner style. It completely snuck up on me and then, just as quickly as it came, it was gone. I can't believe it was only last weekend! May has flown by, although I can't really say I'm upset by this, there's no point in delaying the inevitable...the onslaught of the heat-laden days of summer. Oh how I am already longing for the days of fall (or relocation to a cooler, more enjoyable climate), but I digress.

As is our custom for holidays, we spent Mother's Day up in the Keystone State (Pennsylvania). When my parents moved back to the east coast a few years (actually, wow, five years this fall) it wasn't long before they discovered the best crab cakes in Maryland. Growing up, Maryland's ability to do wonderful things with the blue crab was ingrained in me from a very young age. I was a fairly picky eater growing, but I never met a form of crab that I didn't like. My mother has always been somewhat of a connoisseur of crabcakes in particular, so when we discovered By the Docks, it was love at first bite. Periodically, we'll either eat there or get take out and shlep it across the Maryland line.


Heaven on a plate...I wish I had photographed him next to something else
so its true proportions could be understood :)

Since Mother hates eating out on Mother's Day, it was a take out kind of day. With crabcakes in tow we headed up to PA for a delightful feast, topped off with my creations for the day. Unfortunately, unlike the crabcakes, my desserts were not without disappointments.

I blame myself mostly, I don't take well to failure (in this case it was also due in part to the stupid heat, which served to melt them and from which they never quite recovered). Despite not being pretty, they were at least good and their tastes were well receieved, so the morale of the story is: the recipes are good. Keep them in a cool, dry place and you'll be golden.

Cheesecake Brownies
Inspiration found here

Ingredients

Brownie Layer
  • 1/2 cup unsalted butter, cut into pieces
  • 4 ounces unsweetened chocolate, coarsely chopped
  • 1 1/4 cups granulated white sugar
  • 1 teaspoon pure vanilla extract
  • 2 large eggs
  • 1/2 cup (65 grams) all purpose flour
  • 1/4 teaspoon salt

Cream Cheese Layer
  • 8 ounces full fat cream cheese, at room temperature
  • 1/3 cup granulated white sugar
  • 1/2 teaspoon pure vanilla extract
  • 1 large egg 
Making it was at least fun


Preparation
  1. Preheat oven to 325 degrees F and place the rack in the center of the oven. Have ready a 9 inch square baking pan that has been lined with aluminum foil 
  2. In a heatproof bowl, placed over a saucepan of simmering water, melt the butter and chocolate. Remove from heat and stir 
  3. Preheat oven to 325 degrees F and place the rack in the center of the oven. Have ready a 9 inch square baking pan that has been lined with aluminum foil 
  4. In a heatproof bowl, placed over a saucepan of simmering water, melt the butter and chocolate. Remove from heat and stir or whisk in the sugar and vanilla extract. Add the eggs, one at a time, beating well after each addition. Stir in the flour and salt and stir vigorously until the batter is smooth and glossy (about one minute) 
  5. Remove 1/2 cup (120 ml) of the brownie batter and set it aside. Spread the remainder of the brownie batter evenly onto the bottom of the prepared pan 
  6. Then, in the bowl of your food processor (or with a hand mixer), process the cream cheese just until smooth 
  7. Add the sugar, vanilla, and egg and process just until creamy and smooth (do not over process). Spread the cream cheese filling evenly over the brownie layer 
  8. Spoon 16 small dollops (4 rows with 4 dollops of brownie batter in each row) of the reserved brownie batter evenly on top of the cream cheese filling. Run a knife or wooden skewer back and forth through the two batters until you have a marble effect 
  9. Bake in the preheated oven for about 30 minutes or until the brownies are set and the cream cheese is just beginning to brown. (A toothpick inserted into the brownie comes out with just a few moist crumbs) 
  10. Remove from oven and place on a wire rack to cool completely. Then cover and refrigerate the brownies until they are firm enough to cut into squares (several hours or even overnight) 
  11. Once chilled, remove the brownies from the pan by lifting with the ends of the foil and transfer to a cutting board. With a sharp knife, cut into 16 squares. It is a good idea to have a damp cloth nearby to wipe your knife between cuts. Brownies can be stored in the refrigerator for several days. Serve cold or at room temperature (and don't leave any where too warm, as that was my downfall) 
Sister helped me salvage some for displaying on my beloved stand


I also made these fun lemon bars, but the heat was even less forgving to them. After bring allowed to chilll overnight, they re-hardened nicely and were very good. Biggest take away from the day: don't leave desserts in car during the summer months.